
Recently, I haven’t been acquiring a lot of test equpiment, for my own workshop aka museum, because space here in the US is limited, and carrying all these things over to Germany again in 1 or 2 years will be a hazzle. But this time, I could not resist – a Micro-Tel 1295 receiver, for less than 1 ct. per USD 1980s list price! The parts alone, a 2.33 GHz low noise LO, 2-8 GHz Avantek YIG, 8-18 GHz Avantek YIG, a 2-18 GHz broadband coupler, various microwave mixers and attenuators, all of the best mil-spec quality, well worth it.
Also, it will be a great addition to the precision attenuation test set-up: a dedicated receiver each, for the through and reflected power! And, we can safe one coaxial relais (to switch either through power, or reflected power, to a single receiver), and everything will be faster, by almost a factor of 2. The only downside – another PLL will be required, but well, this is just a matter of a rainy weekend.
It arrived well packaged, no damage, except a missing frequency display bezel (which was easy to source, exact fit), but one thing I did not expect: the paintwork on the upper and lower cover, and side panels, has converted into a mixture of honey and chewing gum, a sticky mess, and dark green! So, first task was to strip off this “paint”, which was pretty easy using some methylated spirits, and engage a bit in spray painting. Hunter’s Green.
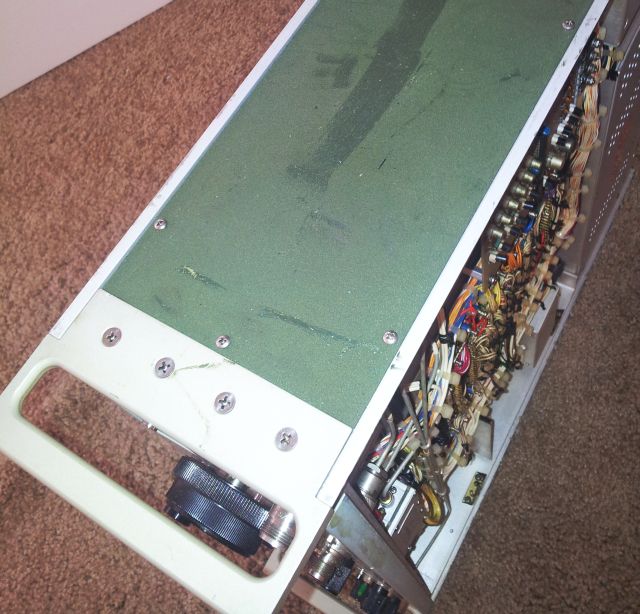
See the dark green side panel – covered with sticky paint! Now, it is finally clear to me, why the 1st unit, the 1295 acquired earlier, had been re-painted by his former owner….
Note that the lid and side panels have numerous screws and nuts (more than 100 single pieces!) – quite impressive, how little Micro-Tel had to consider manufacturing cost!
One issue found so far: the IF distribution relais had some intermittent noise – most likely a bad contact somewhere. So took out all the board, cleaned up the edge connectors (all gold plated), and moved the connectors around a few times – and, the issue is gone.
A note on edge connector cleaning: this is best done, from my experience, we some special type of eraser. Don’t use anything harsh, abrasive, or natural rubber. It will either scratch it gold coating, or leave traces of residue behind that isn’t going to improve contact resistance and reliability.
Best suited at vinyl erasers made especially for PET film or tracing paper. Prismacolor Magic Rub.
These crumble a bit, but the vinyl materials absorbs all the dirt, and can be brushed of easily, with an ESD brush.
The unit is overall very clean, just the frequency calibration/display seems to be quite a bit off. This will be the next step, after a thorough warm up.
And, as for the first unit, I will add a parallel to serial converter for the display, same as for my main Micro-Tel 1295, because I don’t want to use the IEEE-488 bus for this device. It will have the same 2400 baud (TTL-level) serial output. Also, a little capacitor will be added, to limit the bandwidth of the Freq Control/YIG driver amp when in external mode – this seems kind of a bug of this device, because the larger bandwidth only increases noise, and the receiver is not build for fast sweeping anyway.