
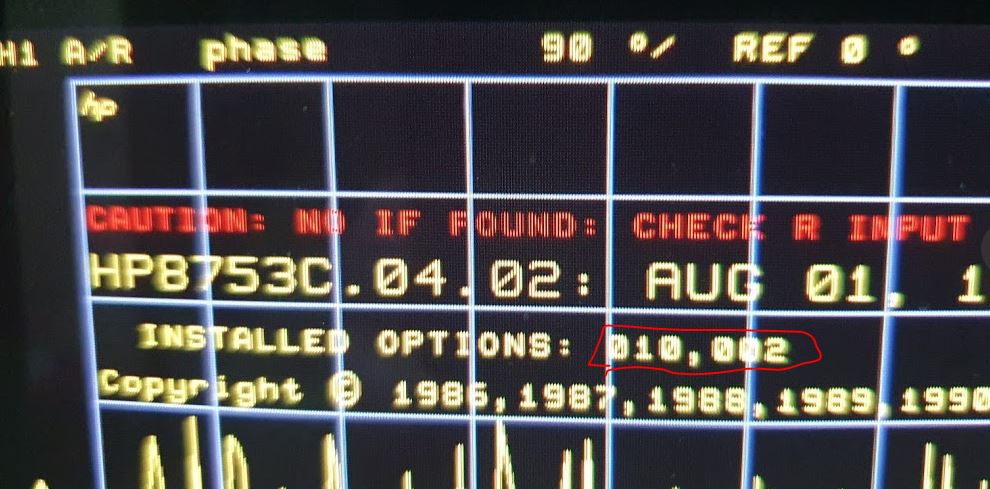
The HP 8753C comes with some software options 010, time domain (essentially, a built-in FFT function), and the even more useful harmonic analysis, option 002. These work without any further calibration, and used to be available as a code to enter to the instrument , with service function 56, to update the option status.
Thanks to a kind gentleman, such codes are available now, and normally you can add them to the 8753C without any expert knowledge and risk.
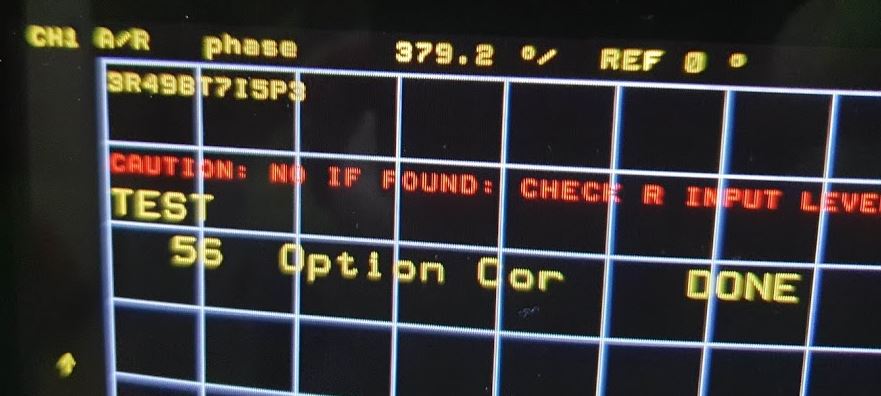
Unfortunately, for this instrument, the method to add options by code entry didn’t work. How come? As much as we know, the option code depends on the serial number, let’s check if the serial of the CPU board is the same as that of the instrument (ending in 00860). A first hurdle, how to read the serial – it is not showing upon startup for the 8753C, but you can get it by first executing service function 55, which will fail, and then go to Display-Title.
To my big surprise, the serial shown is incorrect, only 4 digits, missing the “8”.

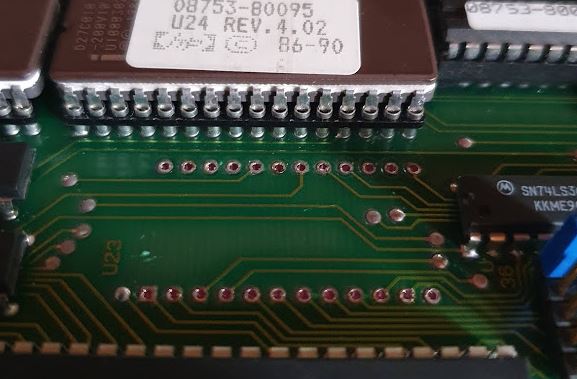
Accordingly, we need to dig deeper, and the serial number and other information is stored on the U23 EEPROM, a 2kByte chip, Xicor.

It is a very long lasting device, no reason to believe that it will fail anytime soon, but there are always risks. First, I read all the coefficients via GPIB, and then carefully desoldered the chip.
Actually, desoldering went very well, even just with plain tools, a soldering iron and a manual solder sucker.
The programmer, put together from a few jumper cables, and an ATMEGA128A board. When reading, I hardwired the WE- write enable input to VCC, to make sure that no data are lost. There are also 6k8 pull ups directly on the ZIF socket, to make sure the input stays “High” even if the jumper wire is not connected well.

In the EEPROM, clearly there is the incorrect serial, it is not actually missing a digit, but has an incorrect character. Maybe it got modified when the CPU clock failed (remember that this board had a bad osciallator?
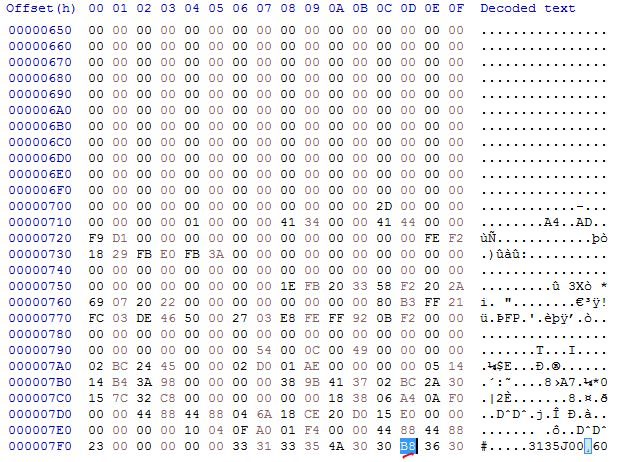
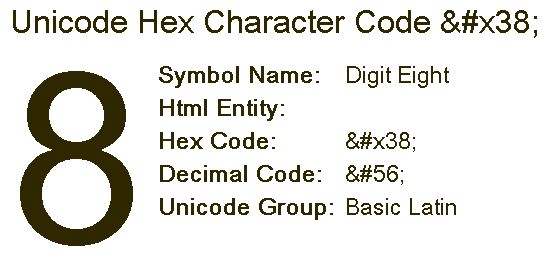
Now, we need to put in a single character, an “8”.
I don’t normally need to program 2816 EEPROMs, so rather than taking chances with some incompatible programmers, I made a small program, to just set a single byte, at a given address. In this case, writing an “8”.

With the serial number corrected, put the EEPROM back onto the CPU board – using a precision socket.
Using the secret code that only works with the matching serial – and with the write protection of the CPU board disabled – the option install worked perfectly fine.
Now, the 8753C shows the options upon startup, and the time domain and harmonic analysis functions show up in the menu as softkeys.
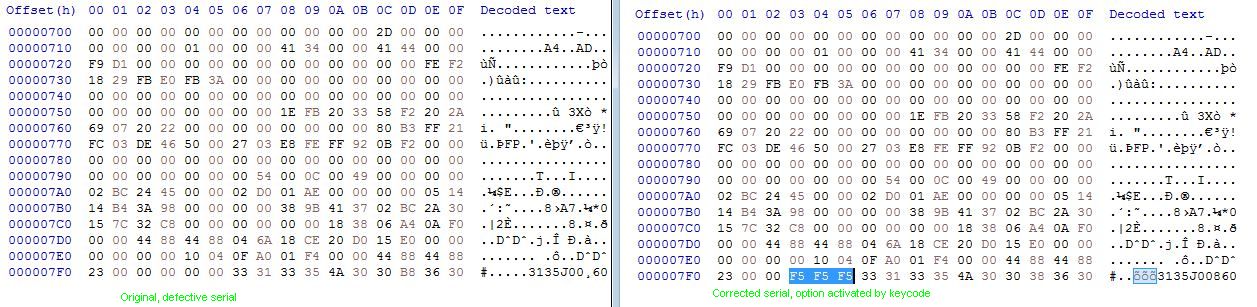
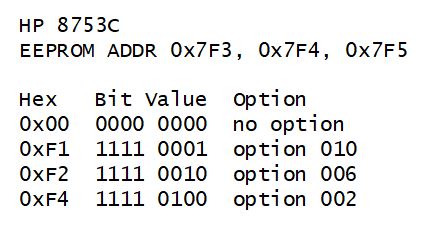
Afterwards, I checked the EEPROM contents again, there are only 3 bytes changed, in-line with what can be found in online forums. Also tried to activate the 006 6 Ghz option, not much use for me, but the option code is same as seen for the 8753D, etc. There are 3 bytes, right in front of the serial, with the upper half-byte bits all set (0xFx), and the lower half-byte encoding the options in a bit-wise fashion. With no options, the three option bytes are all zeros 0x00.
If you need any of these EEPROMs or related advise with the 8753x units, just drop me a line.
Do you know how HP calculates checksums for EEPROM data?
I am adding the high stability time base option (01) to an HP 8642B Signal Generator and would like the “10 Mhz Ref. Oven Cold” message to be displayed. I have decoded the EEPROM and know where the option information should go but cannot determine how the checksum (located at the end of the serial number/ model/options block) is calculated. The manual indicates that there is a separate checksum for the upper byte and the lower byte as the 16 bit data is stored in two 2816 EEPROMs. Thank you for any help you may be able to provide.
Hi David, I dont know it of hand, but each eeprom has the separate check sum according to the hp journal. In other cases i just tried all the possible checksums and maybe you are lucky after 100 tests.. sorry that i have no better advise.
Simon,
Thank you for your reply. You are correct – the 16 bit words are stored in two 2816 EEPROMS and therefore there are two checksums, one for each EEPROM. Rather than using the EEPROMS I have written a program that emulates the EEPROMS and will run through the values until I find both checksums. Luckily, the software in the 8642B provides separate error messages for high, low or both checksums bad.
Thats a good idea. If you find out something useful for others, i am happy to post it here or just send a comment. All the best!
I have a question which is related to the first problem that you had; how to get the 8753C serial number. I am trying to read the serial number via the GPIB with the manuals mnemonic OUTPSERN. I have tried variations around that with no luck. My computer is talking to the analyser and I am able to control the analyser and download data from it so the OUTPSERN is the only mnemonic that is failing me. I am considering placing the serial number in the title and then downloading it to the computer. My problem is that I am unfamiliar with the service menu and loath to create a problem. Could you please give a more detailed explanation of how you perform “first executing service function 55, which will fail”. Thank you in advance.
Hi, yes, there is a menue it the submenue of system, service, to execute service function. Just navigate to that menue and execute service function 55. Then it will show the number when you display title. You can just write it down. It could be that not all 8753c versions support the serial number call. Also, some show the serial number when powered on, others don’t. Simon
in most cases also system-service menu-firmware revisions shows the serial number