Workshop upgrade: Light fittings, and luminous efficacies

With the workshop basic repairs complete, how to set up a cost-effective lighting system?

Some items to consider
-I will be working there mostly after work, late in the evening, and mostly in the dark winter months. So I need daylight and bright light to keep focus.
-Diffuse light along will not be enough. I like the feeling of incandescent lights, so there need to be some work and bright direct lights.
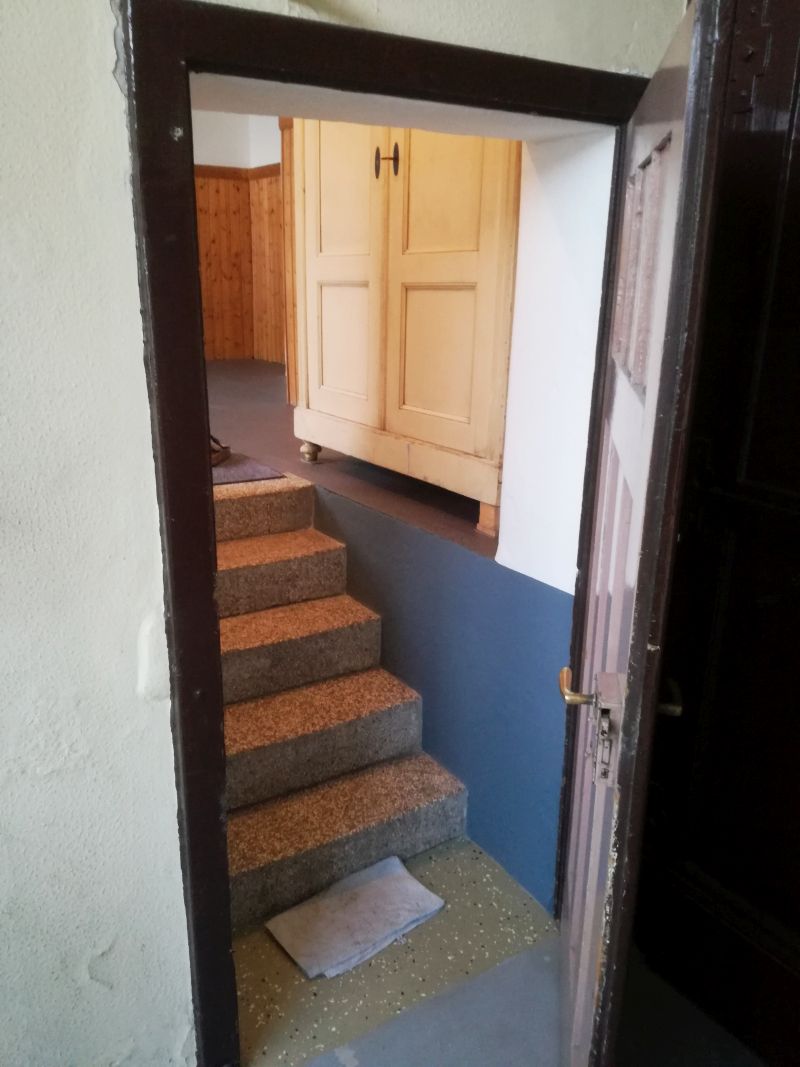
-Some areas, like the stair, will need a separate light, which needs to be “ON” immediately after the switch is pushed. Same applies to the other lights – there should be no dimm start-up, flicker, or start-up delay.
-Light level needs to be high, because the main purpose of this room is the assemble, fix, and test high frequency/microwave assemblies, and fine-mechanical devices.
-Because this is a hobby, we need to keep expenses down, both for the initial cost (light fitting and lamps), and the running cost – electric power cost.

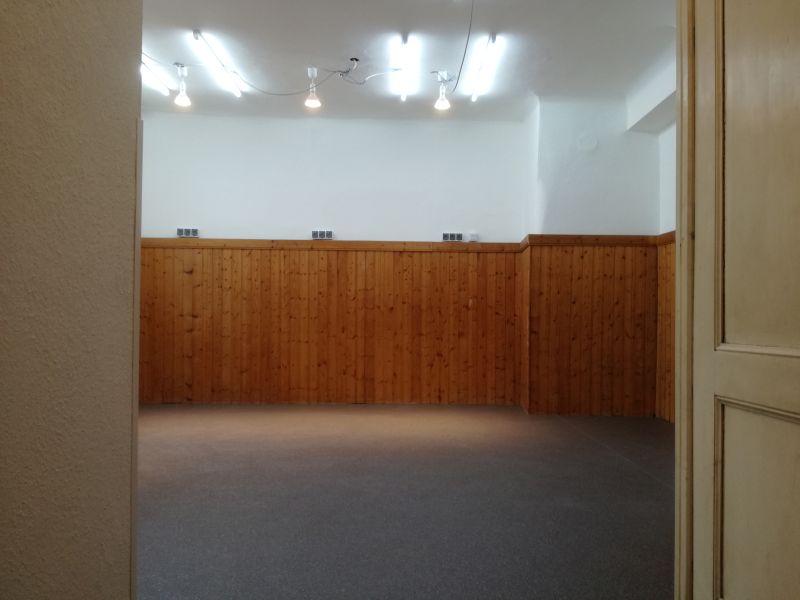
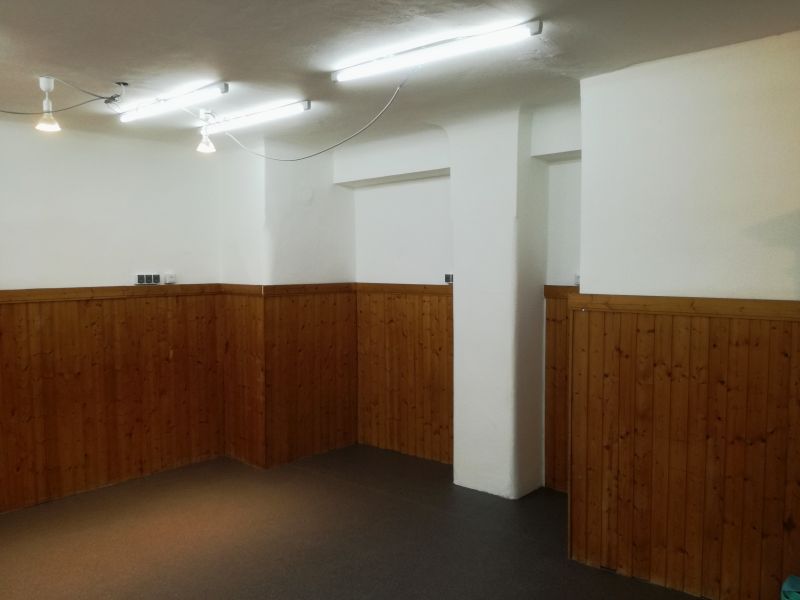
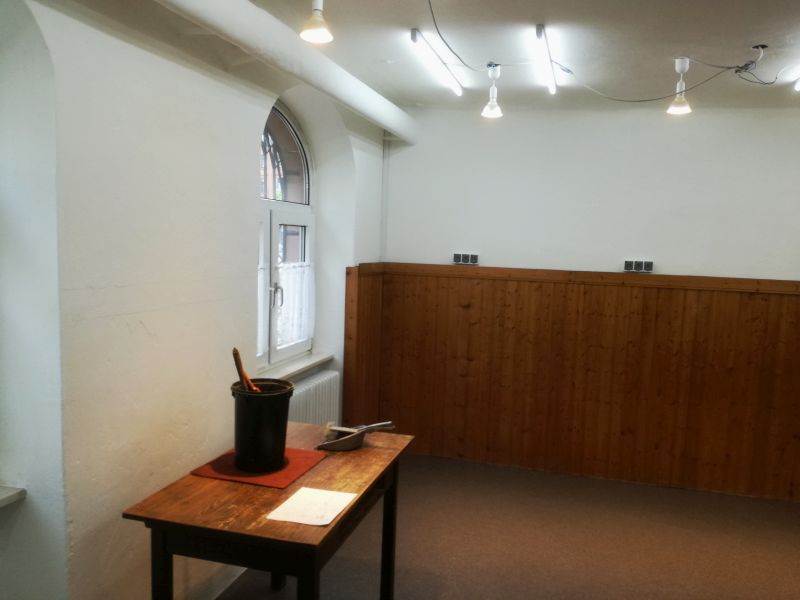
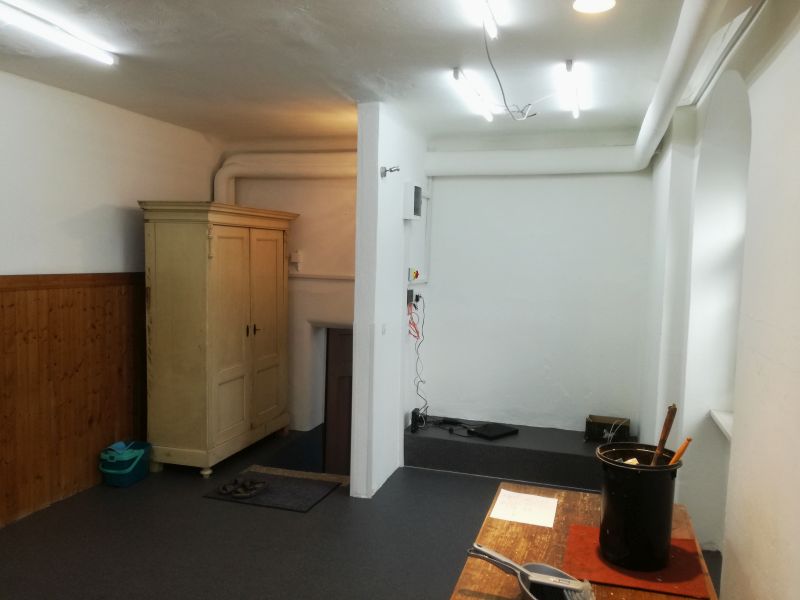
This is a plan of the room layout, rectangles mark the position of tables.

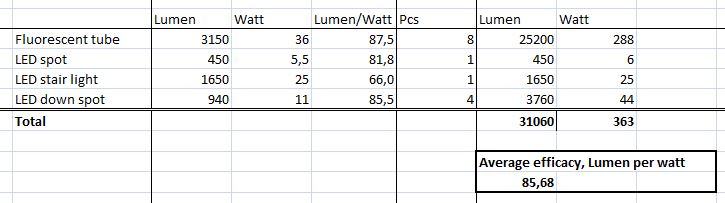
Essentially, two kinds of light sources have been considered – T8 fluorescent, for the background illumination, 8 pcs. 25200 lm total (EUR 5 per piece, including lamp and electronic started – a bargain). And 4 PAR38 30° LED down-spots (these replace the 108 W halogen lights, and have still have a nice glass body).

licht parathom

These are about EUR 13 per piece, and the light fittings are simple screw sockets E27 size, EUR 1.50 per piece.

licht raumplan

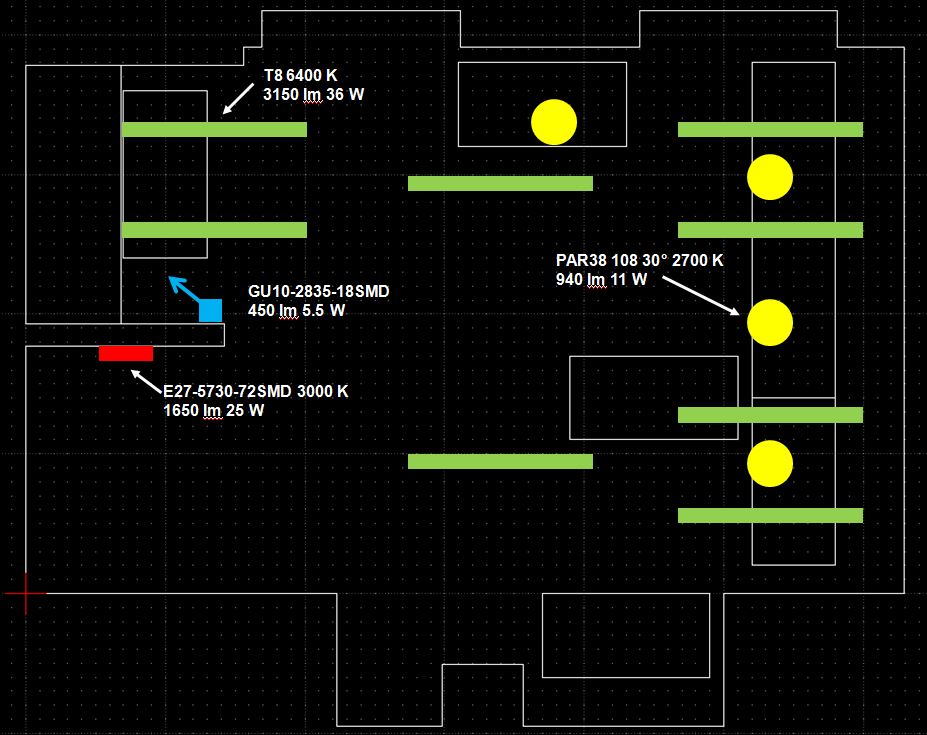
Some calculations done – total of 31 kilo-lm, 363 Watts (which is quite precisely found when checking the total current to the workshop with a wattmeter). ~85 Lumen per Watt, which is a very good value.

We will need to check the actual luminous intensity at the work surfaces later, because the lumens of the fluorescent tubes is not all going downwards (some reflected from the white ceiling and walls, some lost in the light fitting).

licht efficiacy

Life time these lights are rated for 25000 hours (LED), or 12000 hours (T8 tubes). This means, 3000~6000 hobby days (counted at 4 hours), so there should be no need to change these light bulbs and tubes any time soon.

New test lab and workshop: Renovation update

It has been a bit quiet here recently, not because of lack of activity, but more to the opposite. Currently, my workshop and test labs occupy on room in an appartment, 3rd floor (2. OG in German counting), and 3 basement rooms (mostly for soldering, assembly, and mechanical fabrication; plus 2 basement rooms in a house 2 hours drive from here… with some of the not-so-often-used heavy metal working machinery).

After some negotiation, I was able to get another room, which is on ground floor, well heated and rather constant temperature all over the year, and is has daylight – this all in a beautiful building that is even listed in the historic monument directory of the state. It has about 28 m2 floor space, and quite ideal for my needs to have a clean working area, for assembly of equipment, and detail testing. It is also much closer to the soldering workshop and parts storage in the basement, and will safe me from walking up and down 3 floor several times a day, during the final assembly phase or during repair works, which often require a combination of soldering, and difficult testing that could only be done so far on the 3rd floor. The basement is great, but it is too humid for operating vector network analyzer, and the like.

Now to the laborious part, the renovation. The had been used in the past as a meeting room for a motorcycle club (probably, in the 80s), and later as a workshop for remote-controlled model aircraft. During the last 3 years, it had been mainly used for storage, with the floor cover, walls etc, all aging away. Also, no internet connection of safe electric outlet available in the room. It took about 7 full days of hard work to get it up to requirement, including, removing all the junk, cleaning and fixing the walls, door, and wooden panels, removing several layers of old floor covers, and putting it all back together again. Another 3 days for all the cables, in particular, the network cables (all done using CAT7 LSZH 4x2xAWG23 S-FTP; one short section is CAT6 CCA PVC shield) and ethernet (CAT6) wall outlets.

Here a network map, mostly for my own reference, with the two servers (HTTP, SAMBA), running at 192.168.130 (this is the active server, a Dell Optiplex FX160 – it uses an ATOM processor, running Ubuntu, and is a really power efficient way to run such a system, 2 TB RAID0), and 192.168.77.140 (arctur, a Dell Poweredge server, 2×3 TB RAID1, used for backup of the active server, and also as a backup webserver in case of hardware failure or the FX160). All the switches were selected for low power consumption, to keep this green and low running cost. There are two WLAN transmitters, so now there is good bandwidth all around the (large) house and even in the basement and garage.

The WAN connection is via a cable modem, which is located in the 3rd floor apartment (2. OG), and works at 100 Mbps down, 6 Mbps up (this is good for now, usually getting abot 80~90 Mbps down, and the full 6 Mbps up, probably upgrading to a 100/100 Mbps connection next year).

A quick test of the network speed – by measuring the transfer speed from and to a ramdisk on the acrux server. Getting 50~70 Mbytes per second, from all locations of the network. That’s certainly fast enough.

werkstatt network map

This is a view for the power distribution, and network distribution box.