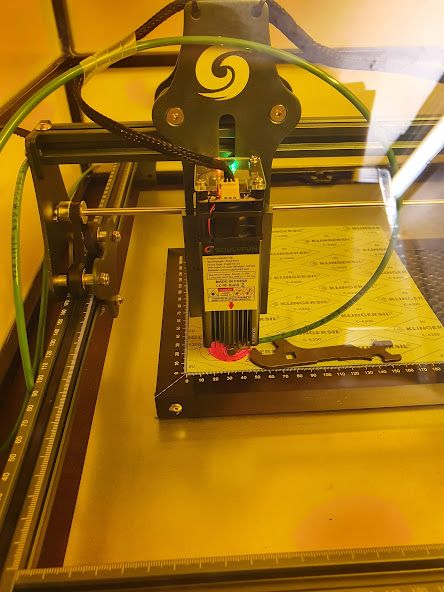
Finally I find some time to document all the remaining parts of the laser cutter, Workshop Upgrade: Laser cutter and engraver SCULPFUN S9. The cutter itself is just the common off-the-shelf kit, but the air nozzle and enclosure has been custom made. If you want to cut wood, paper, plastics, there will be a lot of bad-smelling and potentially toxic fumes, so better you enclose the machine and provide adequate ventilation. Also, for wood, paper and such, you will need a strong air flow to ensure clean cutting without burn marks.
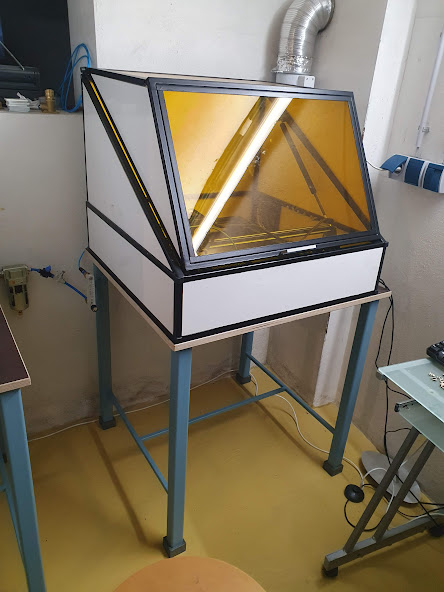
The setup is now arranged in the basement, so that it can be used quickly and without setup time. There is a metal plate inside, zinc plated steel, so thin materials can be fixed by magnets.
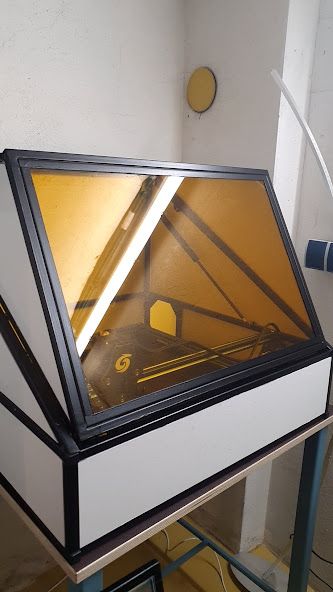
The enclosure, made from 15×15 mm square steel tubing, painted, and the openings closed with white PVC sheet, and yellow (laser-blocking) Plexiglas.
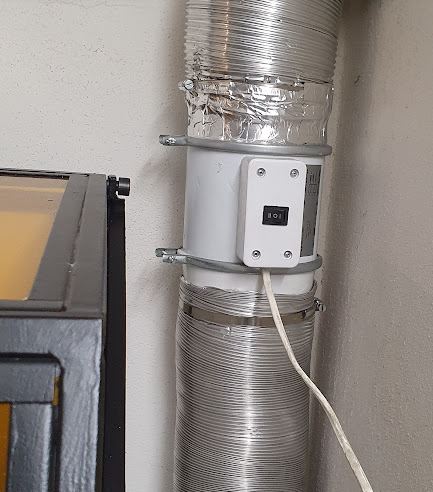
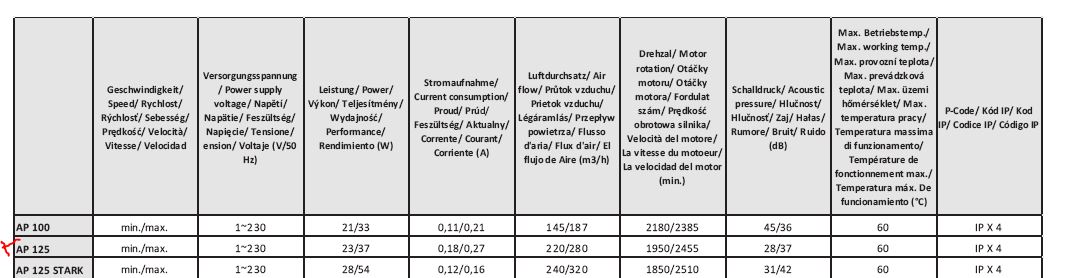
The exhaust is a fan I had handy, a Dalap AP series 125 size, it is quiet and powerful, but surely any similar fan could be used.
There are some openings around the cover (upper) part of the enclosure, accordingly, air can enter and flush out the fumes. The off-gas is connected to an old, disused chimney.
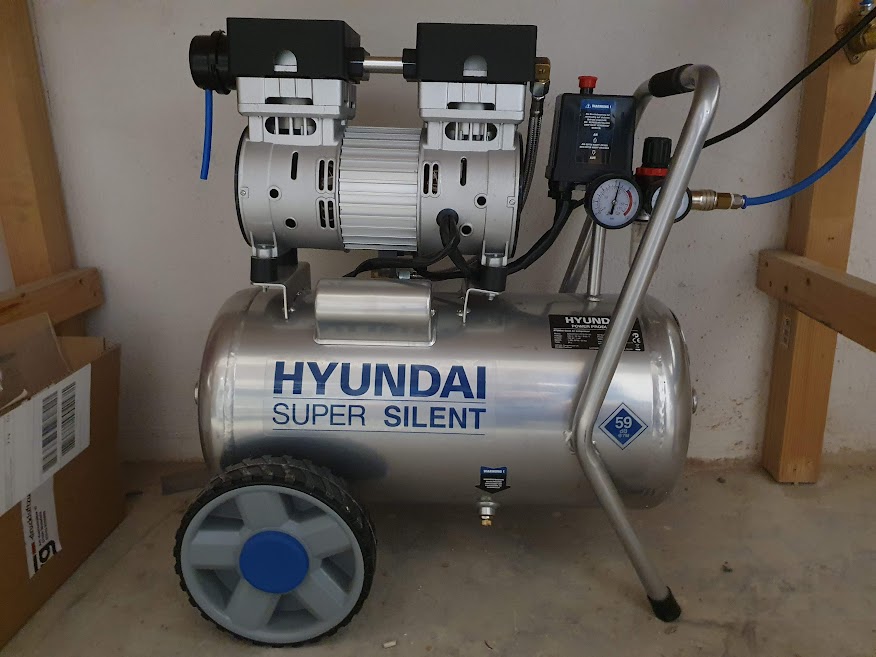
Next, we need a reliable air source. In the main workshop, I already operate a larger air compressor, but it is noisy, and there is no pipeline to the house. Rather than building such pipe system, I decided to setup a second compressor, a quiet compressor, to make the work with the laser cutter more comfortable (hard to focus on any work close to a running compressor…).
It is a Hyundai brand silent compressor, quite decent built quality, and inexpensive for what it is.
With these data, it is running about 30% of the time, when the cutter is taking the full amount of air.
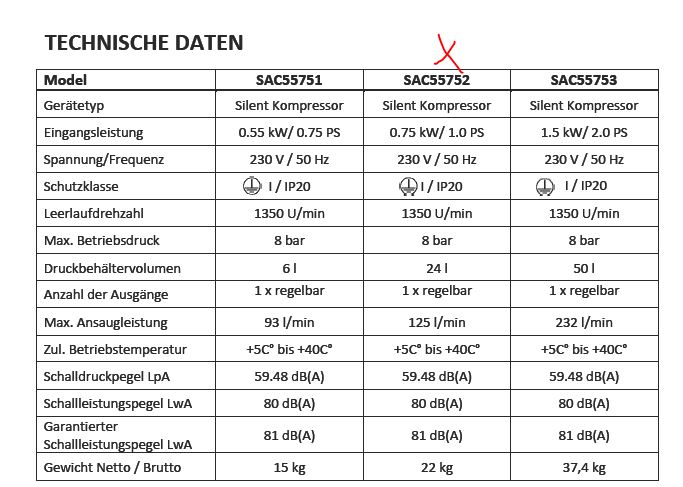
The tank is running with 6-8 bars pressure, by on-off regulation. The line pressure is set to 5 bars, so the pressure to the laser cutter system is stable.
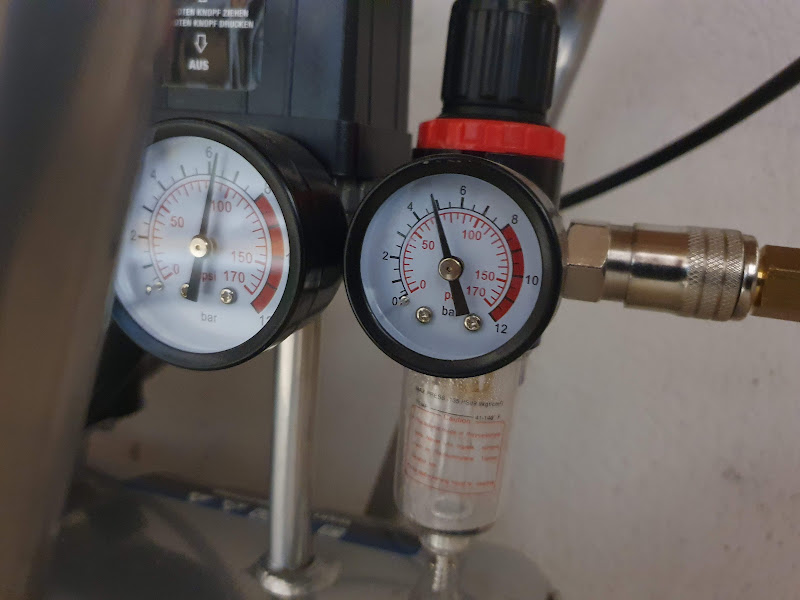
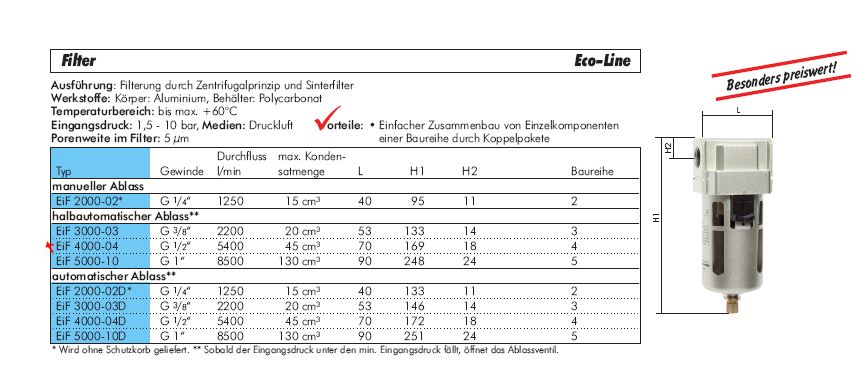
There is already a moisture (water droplet) filter at the compressor, but I added another air filter, a simple model, EIF 4000-04, which is a centrifugal filter including a 5 micron particle filter. This is prevent particles from getting into the needle valve (potentially affecting or blocking the air flow), and removing any water droplets (condensate) in the line.
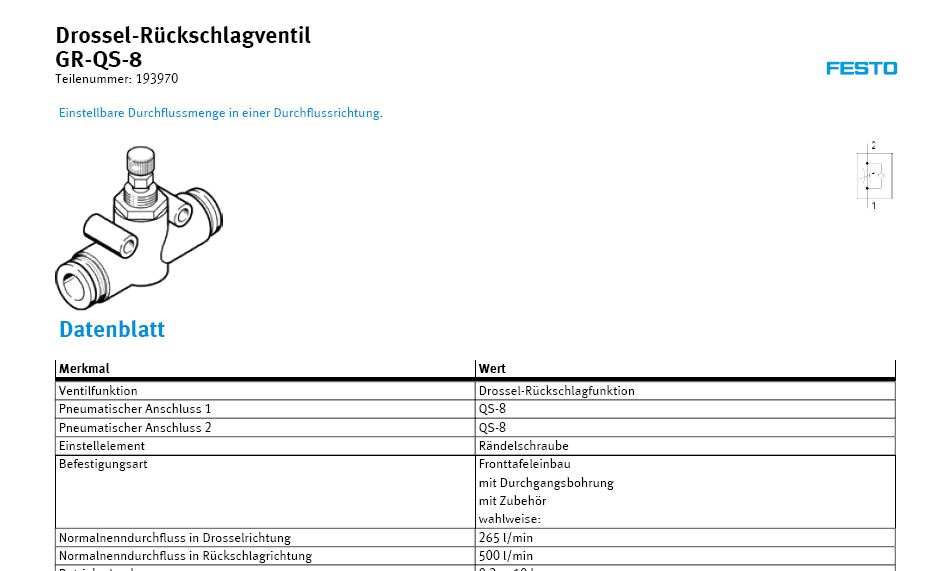
For easy use, there is a cut-off valve, and precision needle valve (Festo GR-QS-8) to set the air flow at the desired value.
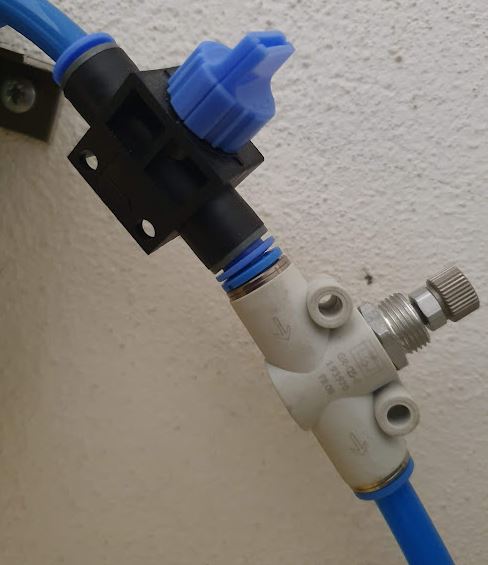
The GR-QS-8 was cheaply available, but sure any similar precision needed valve will do.
The flow meter has a built-in needle valve, but strangely, when using this valve (partially closing it at inlet pressure of 5 bar, outlet pressure basically atmospheric), it causes the metering sphere to rotate quickly and with noise, showing completely incorrect readings. So I believe the design of this built-in needle valve is somewhat flawed.
Be sure to install any valve BEFORE the flow meter, because if you operate the flow meter under pressure, it will show completely incorrect readings. 16-18 L/min is plenty enough for the cutter to work without any burn marks. I have not optimized this much, but maybe you could also work at 12 L/min for most situations.

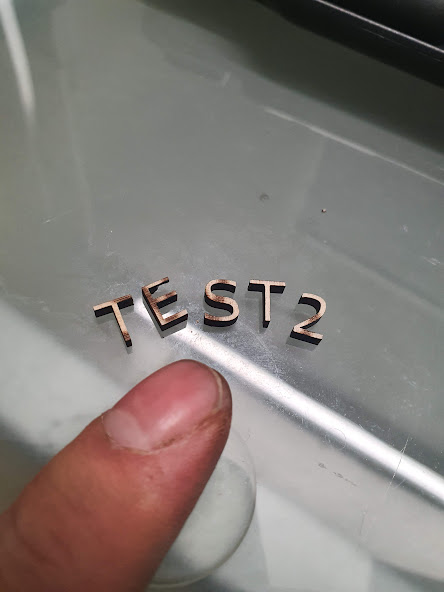
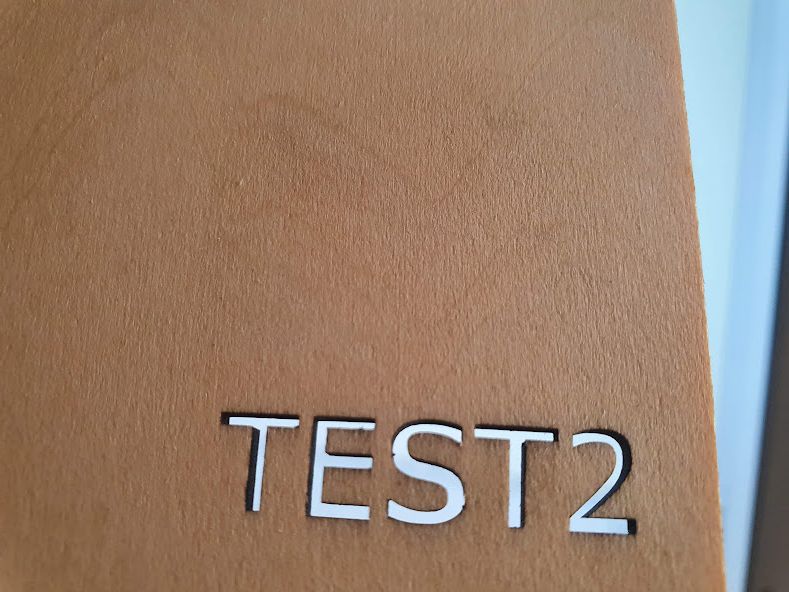
Cutting plywood works just great, with maybe 0.2 mm cut width.
All the contours are nicely defined.
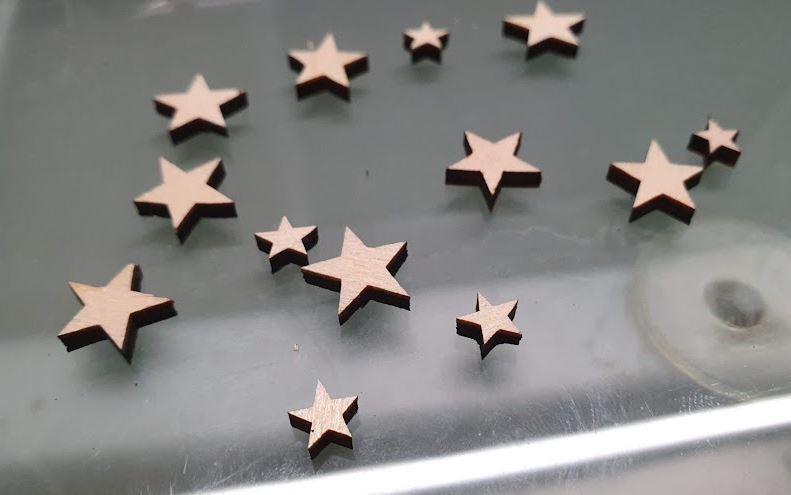
Even stars or pointed objects can be cut without any trouble. These are just about 3-5 mm size!
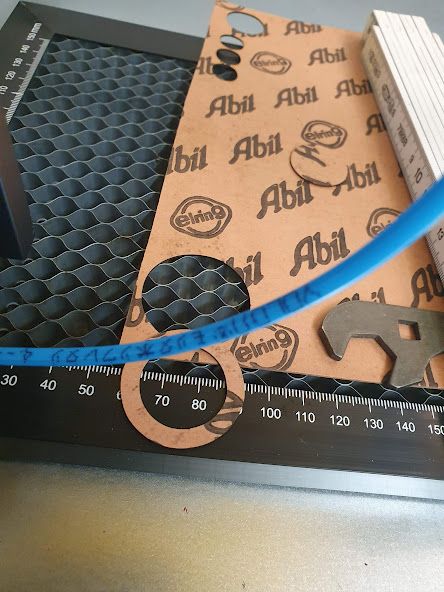
With some materials, like, rubber and aramid enhanced seal papers, these don’t cut well, or not at all. And even the vendor (Klinger of brand Klingersil) doesn’t recommend or even support laser cutting of these materials, such seals still need to be cut or punched.
Other seal materials, like, reinforced paper (cellulose) materials including Elring Abil brand materials, these could perfectly fine.