All posts by Simon

Laser cutter setup: air supply, off-gas and various cutting tests

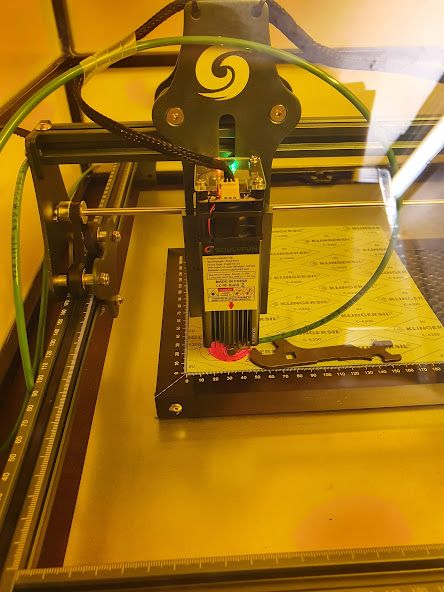
Finally I find some time to document all the remaining parts of the laser cutter, Workshop Upgrade: Laser cutter and engraver SCULPFUN S9. The cutter itself is just the common off-the-shelf kit, but the air nozzle and enclosure has been custom made. If you want to cut wood, paper, plastics, there will be a lot of bad-smelling and potentially toxic fumes, so better you enclose the machine and provide adequate ventilation. Also, for wood, paper and such, you will need a strong air flow to ensure clean cutting without burn marks.

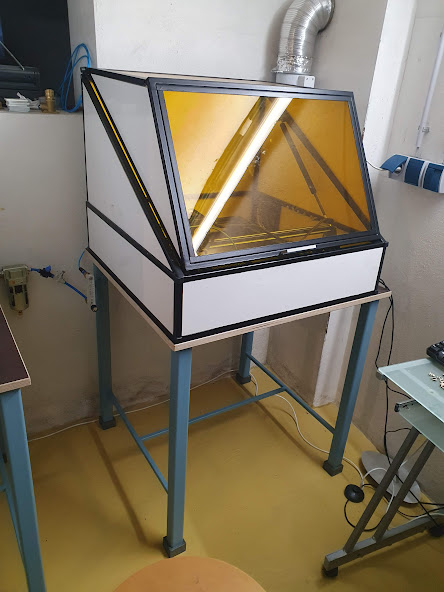
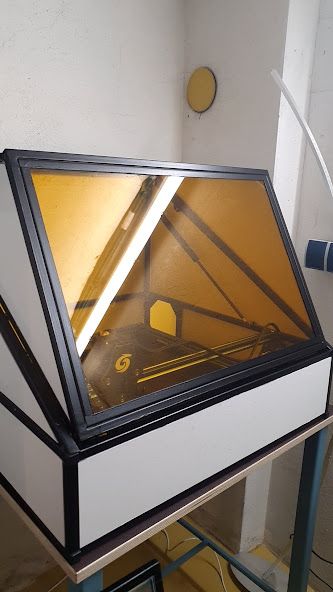
The setup is now arranged in the basement, so that it can be used quickly and without setup time. There is a metal plate inside, zinc plated steel, so thin materials can be fixed by magnets.

The enclosure, made from 15×15 mm square steel tubing, painted, and the openings closed with white PVC sheet, and yellow (laser-blocking) Plexiglas.

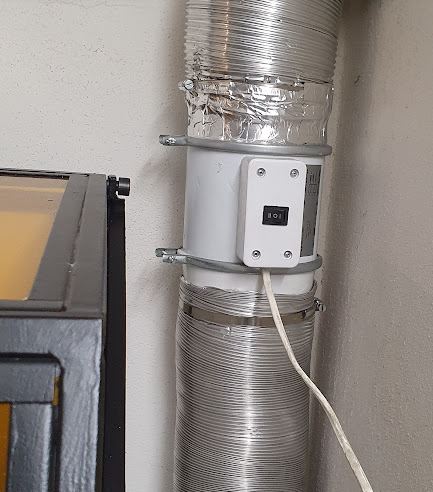
The exhaust is a fan I had handy, a Dalap AP series 125 size, it is quiet and powerful, but surely any similar fan could be used.

There are some openings around the cover (upper) part of the enclosure, accordingly, air can enter and flush out the fumes. The off-gas is connected to an old, disused chimney.

Next, we need a reliable air source. In the main workshop, I already operate a larger air compressor, but it is noisy, and there is no pipeline to the house. Rather than building such pipe system, I decided to setup a second compressor, a quiet compressor, to make the work with the laser cutter more comfortable (hard to focus on any work close to a running compressor…).

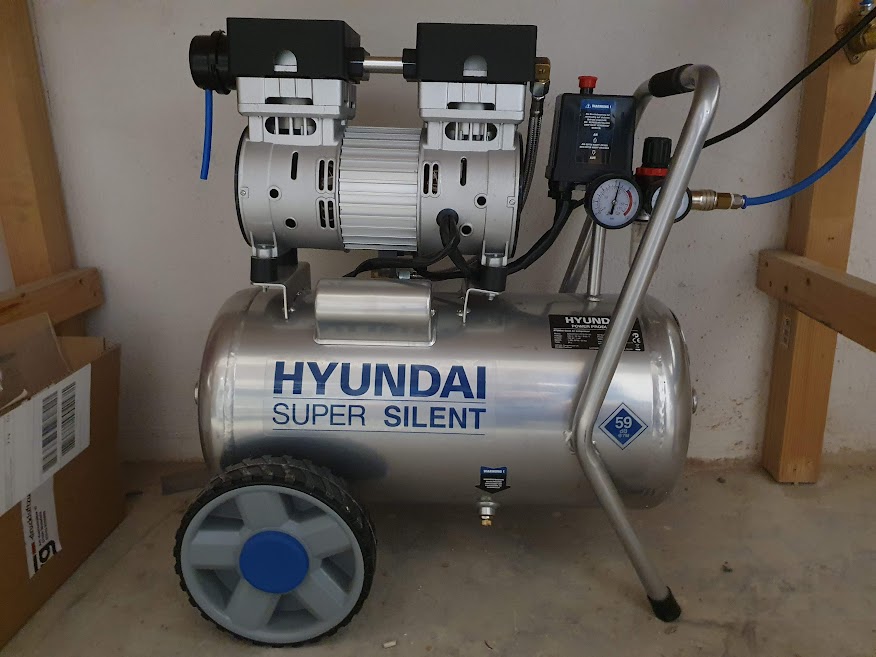
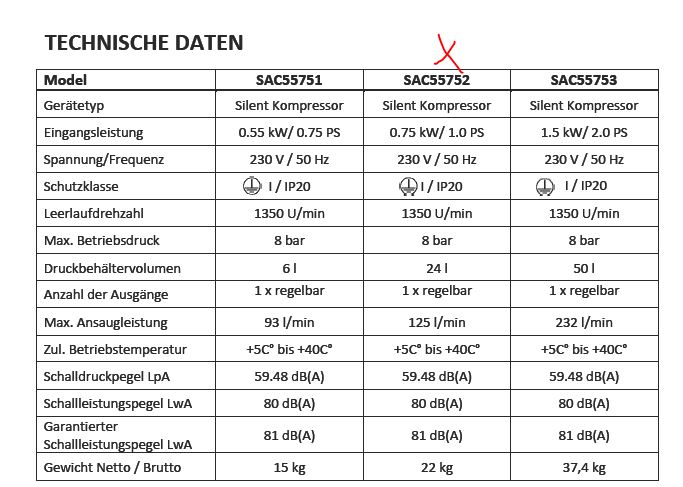
It is a Hyundai brand silent compressor, quite decent built quality, and inexpensive for what it is.

With these data, it is running about 30% of the time, when the cutter is taking the full amount of air.

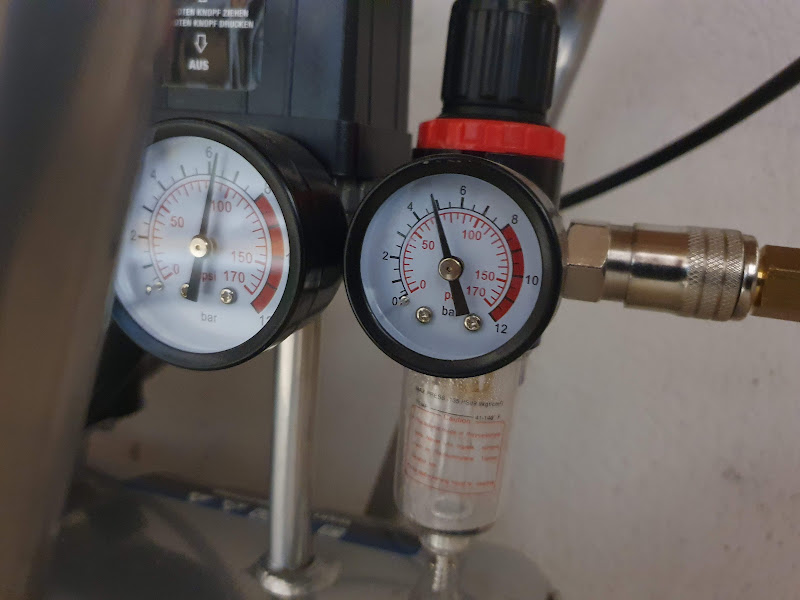
The tank is running with 6-8 bars pressure, by on-off regulation. The line pressure is set to 5 bars, so the pressure to the laser cutter system is stable.

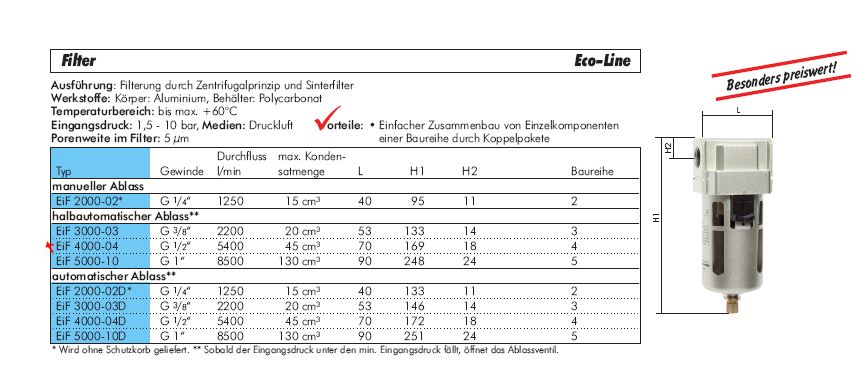
There is already a moisture (water droplet) filter at the compressor, but I added another air filter, a simple model, EIF 4000-04, which is a centrifugal filter including a 5 micron particle filter. This is prevent particles from getting into the needle valve (potentially affecting or blocking the air flow), and removing any water droplets (condensate) in the line.

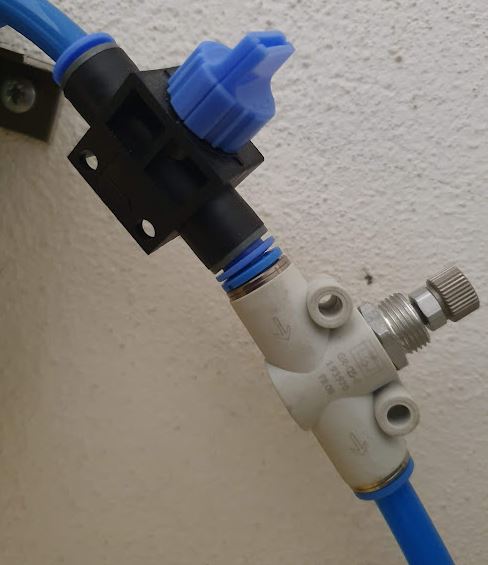
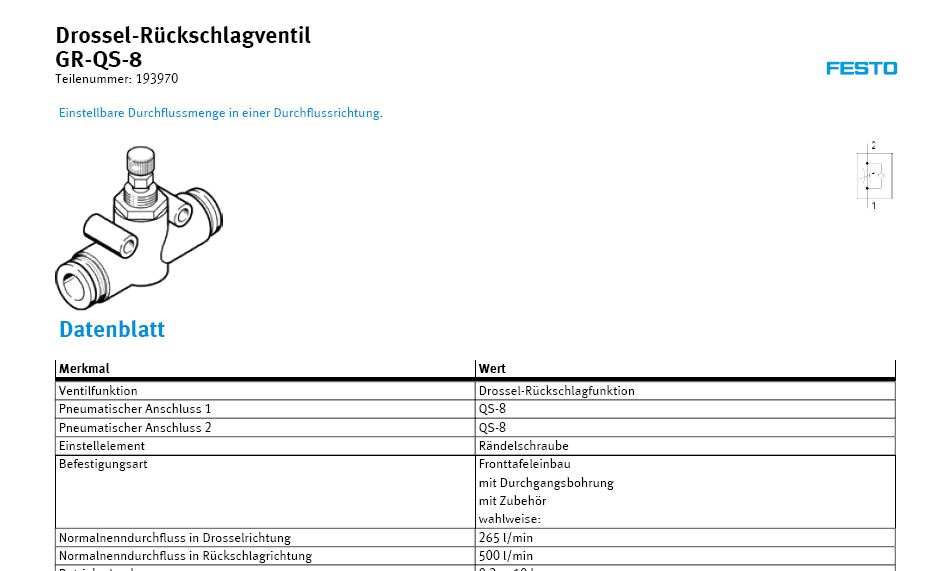
For easy use, there is a cut-off valve, and precision needle valve (Festo GR-QS-8) to set the air flow at the desired value.

The GR-QS-8 was cheaply available, but sure any similar precision needed valve will do.

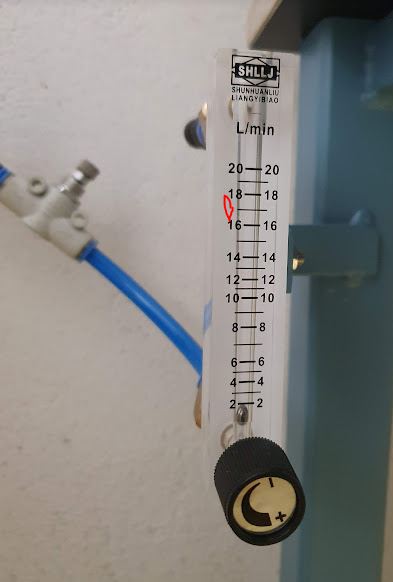
The flow meter has a built-in needle valve, but strangely, when using this valve (partially closing it at inlet pressure of 5 bar, outlet pressure basically atmospheric), it causes the metering sphere to rotate quickly and with noise, showing completely incorrect readings. So I believe the design of this built-in needle valve is somewhat flawed.
Be sure to install any valve BEFORE the flow meter, because if you operate the flow meter under pressure, it will show completely incorrect readings. 16-18 L/min is plenty enough for the cutter to work without any burn marks. I have not optimized this much, but maybe you could also work at 12 L/min for most situations.

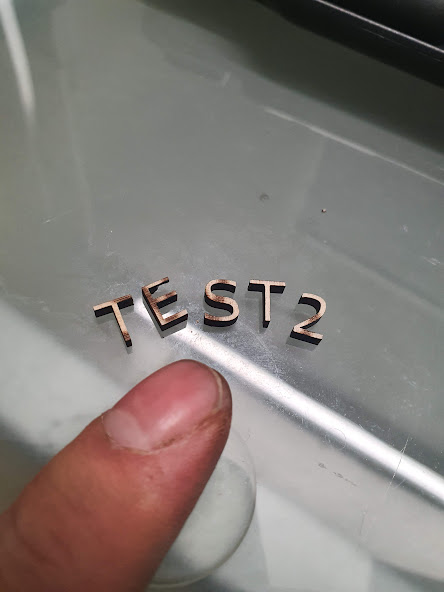
Cutting plywood works just great, with maybe 0.2 mm cut width.

All the contours are nicely defined.

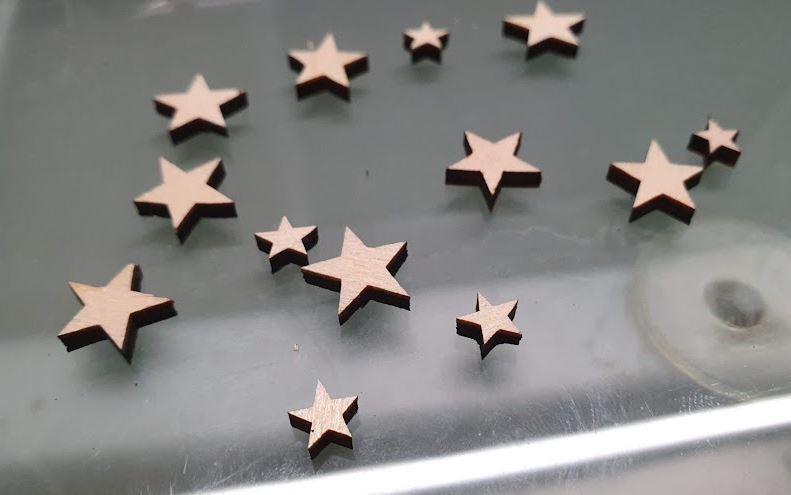
Even stars or pointed objects can be cut without any trouble. These are just about 3-5 mm size!

With some materials, like, rubber and aramid enhanced seal papers, these don’t cut well, or not at all. And even the vendor (Klinger of brand Klingersil) doesn’t recommend or even support laser cutting of these materials, such seals still need to be cut or punched.

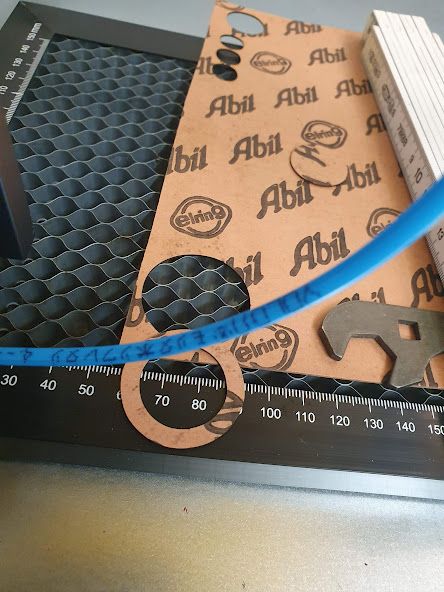
Other seal materials, like, reinforced paper (cellulose) materials including Elring Abil brand materials, these could perfectly fine.

Hewlett Packard HP-85B: a marvelous desktop computer revived

At its time, the HP-80 series of computers were really desirable and expensive computers, mainly intended for control of test equipment and associated calculations. There is a screen, a printer, a tape storage device, all in one case.

For its age, still looking great!

Some cleaning of the CRT, and some other parts of the electronics to remove dust. But no other repairs were needed to the electronics.

All the shielding, all the parts, it seems to have been hand-assembled in small series, with each part individually checked and hand-labeled…

Only trouble is with some stuck keys. These can be operated, but don’t spring back easily.

Unfortunately, a common problem that can’t be fixed easily. Reason is the age, fatigue of the plastic. So I just switched the few broken keys with less-used characters. This is easily done by pulling on the white actuators firmly.

Surely, the HP-85B had quite severally limited memory, and there were many programs available that would need to be purchased piecewise, but thanks to great enthusiasts (google: EBTKS), there is a solution: the EBTKS extension board will provide huge additional memory, mass storage, and a replacement of the tape drive.

A little test program, to set the time, date (no year 2000 problem…), and even the printer still works (just needed a little cleaning).

The paper is thermal paper, but easy to read and can be even used to print simple matrix graphics.

Baking 1&1: delicious cocos cookies

These cookies are not only delicious at xmas time:

250 g soft butter
250 g sugar – beat thoroughly
add 1 egg – beat again thoroughly
add a dry mixture of 1/2 baking powder, 200 g cocos (ground), 250 g flour.

Make rolls of about 2.5 cm diameter (about 30 cm long so that you can easily handle). Let these harden in the fridge for a few hours or overnight. Cut slices about 1 cm thick. These slices will change shape while baking. Surely you can also make other shapes.

Bake at 185°C upper-lower heat for 12 minutes (until the edge is just a little brown).

Baking 1&1: hazelnut cake

A very quickly made cake, if guests announce their coming unexpectedly:

100 g soft butter
80 g of full far margarine (80% fat)
150 g sugar
3 eggs
beat thoroughly.
add 90 g milk, mix thoroughly.

add 180 g flour mixed with 1/2 baking powder (or self rising flour) and 200 g of ground hazelnuts.

Bake at 180°C upper-lower heat for 40 minutes.

Let it cool down in the mould for 15 minutes, then remove.

Baking 1&1: gooseberry cake with almond-based topping

This is the secret recipe for this simple and delicious cake:
3 egg yolks
150 g sugar
125 g butter
250 g flour
a little salt

Prepare a dough and bake in baking mould (28 cm diameter) for 15 minutes at 180°C upper-lower heat.

Beat 3 egg whites, add 100 g of sugar bit by bit
Mix in 50 g of ground almonds

Add about 500 g of gooseberries to the pre-baked cake, cover with the egg white-almond mix, bake for another 20-25 minutes at 180°C.

Cooking 1&1: Pickled cucumbers

Every year the same question: how much salt and vinegar to add to pickled cucumbers. So, once and for all, here is the time-proven recipe:

Cut the cucumbers (peeled and seeds removed) in approx. 1 cm slices and cut in half.

for 1 L of liquid, take:
25(-35) g of salt
(17-)20 g of pure acetic acid (i.e., 80 g of plain 25% concentrated white vinegar, or 400 mL of plain 5% vinegar)
20 g of sugar
4 g of “Gurkenfest” — this will make the cucumber pieces firm and they will keep for a long time
Add some pepper seeds, bay leaves, as you like. I don’t add much.

Alternatively, you can also use 35 g salt, 17 g of pure acid content, for a more salty taste (I prefer more acidic taste for these cucumbers).

Boil thoroughly for 6 minutes at least.

Fill into jars (sterilized by boiling in water for some minutes) and close immediately (turn upside down, let it cool down).

Better not to prepare more than about 1.5~2 L at once, otherwise it is difficult to fill the jars fast enough, or the cucumbers may be overcooked, unless you are working in a rush.

1 L is typically enough for 1.5 kg of cucumbers.

Surely you could also fill the jars cold, and sterilize 25-30 min at 85-90°C.

Baking 1&1: Chiffon cake

A little unconventional shape, but it is very delicious, a Chiffon cake.
It is very famous in Japan, China, and some places in the US, and there are variants including macha (green tea) Chiffon, etc.

First beat thoroughly:
6 egg yolks
50 g sugar
then add 70 g of oil (tasteless vegetable oil like refine rapeseed oil or sunflower oil)
90 g of milk (1.5 or 3.5% fat)
mix it by hand (whisk).
add 120 g of flour (self rising) or ordinary flower (add 1 flat tablespoon of baking powder and mix dry before adding) and mix with whisk (only as long as needed).

Separately beat:
6 egg whites
slowly add in about 5 portions: 60 g sugar

Add the egg whites to the flour mixture, first add 1/3, then mix slowly, then add the rest, mix just enough so that the dough is homogenous.

Fill to non-greased suitable baking mould.

Bake at 170°C for 35 min.

Let cool down for 3 hours upside-down.

Better to cover the bottom of the mould with non-stick paper.

Baking 1&1: black currant cake

This very delicious cake can be made easily.

For the dough:
300 g butter (soft)
280 g sugar – mix it thoroughly
add 1 egg
add some salt
add 1 pc. of vanillin sugar
550 g flour

2/3 is used for the pan, 1/3 for crumbs to put on top

about 900 g of black currants

For the cover:
40 g of butter
80 g sugar — beat butter and sugar throughly
500 g quark (low-fat)
3 eggs

Bake at 170°C upper/lower heat for 50 minutes.

Most essential if you want to dig a well: gravel pump design

The key tool for sinking a well (unless you want to climb in and dig it out) is a device called a plunscher, or a gravel pump. A punscher is a simple metal pipe, with a rubber flap (valve) at the bottom, and it will fill with sand when pulling it up quickly. This has to be done with enough speed to suck in sand, and you can add water to the well to get this done quickly (plunscher only works when submerged – at least mostly – in water). While this works well for sand and small gravel, the more efficient tool is a gravel pump – essentially a plunscher with a piston inside that will actively suck-in the sand from the bottom of the pipe. The piston will lower again under its own weight, and by repeated pulling it gravel pump will fill with sand and gravel quickly.

This is the setup, you can see the blue rope, make sure to use a good and strong rope, because the forces involved are quite substantial and sand will wear down these ropes, so better to exchange them from time to time in case you want to dig multiples wells.

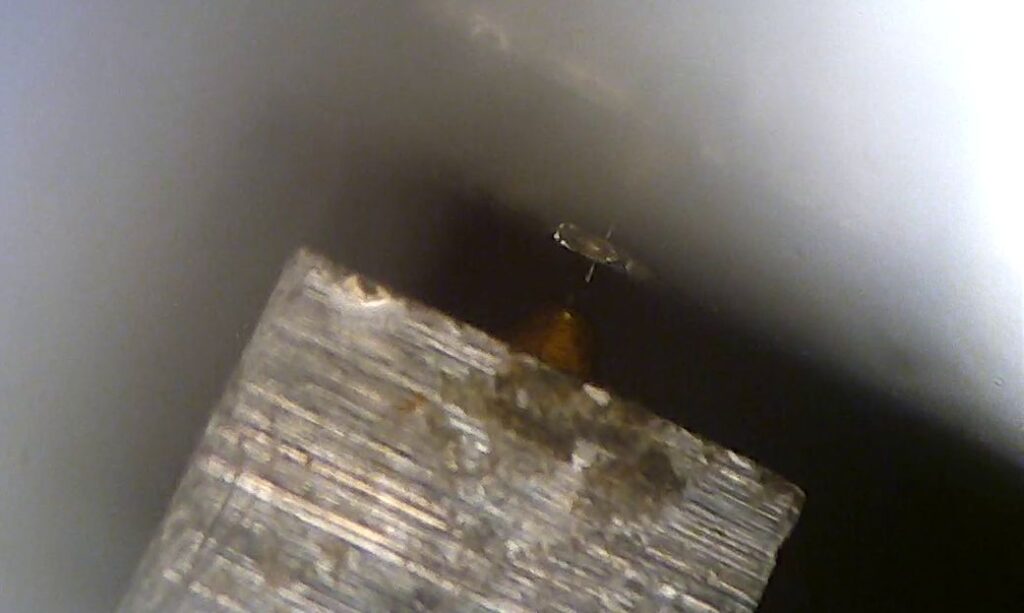
First modification, a washer mounted in the middle of the rubber flap, it ensures better tightness and valve action. Some plunschers have this feature already from the supplier. Better to use some 4 mm fibre-reinforced NBR rubber.

The mounting screws are difficult to reach, so I mad an extension from a piece of wood…

The weld quality of the plunscher wasn’t all that good, but well, this is not a rocket engine, but a tool fabricated to a certain (rather moderate price tag). This price tag is also the reason why you wouldn’t directly by a gravel pump: a good gravel pump will set you back 150 EUR, whereas a plunscher can be obtained for 45~50 EUR. And, surely, it is more fun to do some modification yourself rather than buying all the expensive tools right away.

This is the modified plunscher, you can see the piston, and the cut-out.

The piston needs to have a valve action as to allow the piston to sink at moderate speed, but obtaining good vacuum when pulling the rope. I also tried to use two ropes: one for the piston, one for gravel pump case, but these ropes get entangled and there is no need for such ropes: the weight of the pump will keep it down, if you just pull with the right force and speed.

The piston needs to maintain some clearance from the wall, otherwise, it will get stuck with small stones, etc.

As a seal, I used leather from an old school bag, very firm and thick leather, and a somewhat smaller rubber disc (fairly hard NBR rubber). This worked well with no significant wear. The leather can be made such that there is almost no gap, for example, 1 mm, to ensure strong suction for fine sand. If you have coarse sand, probably you can also work with a larger gap or worn piston seal, you just need to pull the rope more often. I generally recommend to keep the gap small unless you run into some trouble with specific gravel or some particular sand or stone.

At the bottom, for the last meter, I attached a serrated, rather dangerous-looking teeth ring, to cut into the ground and loosen the sand. It worked marvelously. Generally I can recommend to keep the well flooded as much as possible by adding water all the time, then no sand will flow into the pipe if you hit a somewhat “liquid” layer. I probably kept the water level at least 50 cm above the water table.

The rope needs to be mounted such that the piston cannot be pulled out completely, this needs to be adjusted properly. Sure you could also weld a guide ring or similar for the piston, but it worked out very well with the more “wobbly” piston, the vacuum is strong, and the extraction of sand was more limited by the nature of the lowest sand and clay layer, rather than by the vacuum level.

It seems it wouldn’t hurt for the gravel pump to be a bit heavier, for example, by using a longer and heavy-walled tube, but this will also require more force to lift it up. Also the piston could be a bit heaver to sink more quickly, but well, you will figure out how to operate with the tool after a little while, and a shorter gravel pump is certainly more easily handled. Just make sure to wear proper work boots, because your toe may crack if you drop the gravel pump on it. An the serrated front will bite into your foot as nicely as it bites into hard sand.

As for the diameter, it seem that the 89 mm outer diameter is well suited for a DN115 well pipe. I could imagine that with a larger gravel pump, it may be difficult to withdraw, and will be overly heavy. So unless you gain other experience, any pipe around 90 mm outer diameter will work. I would suggest to use 88.9×5.6 which is a bit heavier, rather than the 88.9×3.6 used for the punscher. But probably all will work if you handle it right.

Down from the well: all kinds of sand

Most important for a well is the nature for the water-bearing layer. Already when using the soil drill I noticed coarse sand when hitting the water layer, and it is so liquid that it can be easily washed down and has almost no turbidity. This is basically a good finding, intermediately coarse sand, with little fines.

The top layer had a few larger stone, but in the water bearing layer, the largest were maybe about 8 mm in diameter.

Interestingly enough, the was a solid but -fortunately- thin layer of sand solidified by white matter in about 3 meter depth (just about 1 cm thick layer). Maybe the river running here over my land dried up some 1000s of year ago?

To color of the sand is somewhat red, but this color doesn’t wash out. Diffing further, from about 6 meters down, gray to black sand appeared. This sand was considerably finer and pretty difficult to remove by plunsching, so I used plenty of water and many strokes of a gravel pump to remove it (I modified the plunscher to a gravel pump by adding a piston – will be described in another post).

Finally, at about 7.5 m down, the sand turned more and more black with some brownish clay fragments and plenty of mica (shiny particles).

Given the 0.3 mm slot width of the filter, about 1-2 mm sand would be quite ideal as a water bearing layer, so I was definitely happy to hit solid clay about 7.6 meters down, and sunk the lowest pipe some 10 cm into this clay layer. Note that the clay layer is really heavy pliable clay, it doesn’t seem to swell or dissolve in water easily. So I even decided not to further close the bottom of the well pipe, it seems soundly stuck and closed by the natural clay.

Some study of the sand revealed that the 7 meter sand has quite some sharp and irregular particles that can clog the filter, so better to keep the filter out of this area as much as possible. Maybe the lowest filter section (2 m in total) is now in the black sand layer for about 0.5 meters.

7 meter sand:

Even more important in such case to not overload the filter, to keep sand from getting into the well by keeping the inlet velocity at well below 0.03 m/s, better 0.02 m/s, which is possible by taking about 2000 L/h through the 2 meters of filter section.

The sand in the main water bearing layer is looking much better, it is coarser, and has more rounded shape.

Red marked are some small gravel, and the red lines show millimeter distances.

Main water bearing sand at about 5 meters, microscopic picture:

For thoroughly removing all sand from the well, I used a sand sucker construction from regular PE pipe (32 mm outer diameter), and a 8 mm pneumatic hose inserted such that it is pointing upwards, and extending about 15 cm inside of the pipe. With ample supply of pressurized air (from a compressor) connected, it will pump up a mixture of water and sand even to 8 meters, no problem. Sure it is a mess of water, sand and dirt, but it is an easy way to get rid of all the fine sand and mica that can’t be effectively removed by the gravel pump finally.

I also supplied plenty of water by a flushing tool, finally, also used this to soften the clay and to flush out a few cm of clay, but introducing a fairly high pressure (6 bars) water jet and pumping out the dirty water at the same time.

I continued to pump out water with the air-operated pump for about 1 hour, finally, I connected an old electric pump to the well for about 3 hour, and during all that time there was basically clean water after the first 30 minutes. And so far it doesn’t show any sand residues after one week of use, so maybe we are safe. Let’s check in one year! Surely I will keep all the tools so I can flush out any sand or residues in coming years should need be.