Xmas Bakery: ginger cookies

As some of you may know, ginger is not only praised for its taste, but also improves your health. Especially, with all the heavy xmas foods, why not prepare some ginger cookies that are delicious and help digest the fatty items.

Here is the recipe:
250 g unsalted butter
125 g sugar
200 g ground almonds
300 g wheat flour
1 egg
small amount of salt
1/2 teespoon baking powder
2 pck vanillin powder or some vanilla essence
250 g candied ginger, cut into small bits.

First, prepare a dough with all ingredients, except, the ginger. Once dough has reached uniform texture, add ginger, and knead until it is well mixed in.

Then form rolls, about 1″ in diameter, wrap in aluminum foil and put into the fridge over night.
Take out one roll after the other, and cut into about 1/4″ thick slices. Should look about like this (note the space between the cookies, don’t place them too closely on the tray).

ginger cookies before baking

Bake at 165-170°C in a air-convection oven. Sure, other types of ovens can be used, at medium heat. Bake until slighly brown at the edges. This will take 10 to 12 minutes. Handle with care after baking – let them cool down before any major handling.

ginger cookies baked

These cookies are ready to eat right after preparation, so no need to start with xmas baking in November.

ginger cookies pile

Xmas Bakery: double-choc chocolate trees

These are very delicious and chocolate-rich cookies. Enjoy in moderation.

For the dough, take
200 g ground hazel nuts
300 g wheat flour
200 g sugar
1/2 teespoon baking powder
some salt
2 pck vanillin sugar or some vanilla essence
2 eggs
250 g unsalted butter

Prepare a firm dough and let rest overnight in the fridge.
Take out small portions at a time, roll to about 1/8″ thickness, and punch tree-shapes, or other shapes as you prefer. Dough is not too easy to work with, so add some flower and only roll a small portion at a time, not the whole quantity.

Bake at 170°C, in convection oven. Or similar oven, medium heat. Baking time about 10 minutes.

Once cooled, melt some nougat (Viennese nougat, brown, finely ground nougat; alternatively, some nougat chocolate or hazelnut chocolate, finely ground) and assemble 2 cookies with some of the molten nougat. Keep temperature of the nougat in the proper range to ensure medium-firm consistency, otherwise, it will be hard to assemble the cookies. Total quantity of nougat needed will vary with thickness of application, but 200-250 g should be enough.

Let the assembled cookies rest overnight, in a cool but dry place.

Then, dip in molten dark chocolate (about 300 g needed), using a fork, one cookie at a time.

Place on some parchment paper and let the chocolate solidify.

Package in a box, layer by layer, with parchment in between the layers.
Don’t stack more than 4-5 layers to keep the surface of the chocolate nice and free of defects.

Special Ginger Honey Liquor: Elixir No. 4

To maintain good health and long life, the not-so-secret recipe:

500 g candied ginger, preferably, fresh and strong flavor

ginger candied

500 mL of 40% plain spirit (vodka or similar)
Mix in blender
Store overnight

Filter through a cotton kitchen towel, or similar thin sheet. This is quite laborious; considerable force is needed to get the liquid out but it will work just fine with some patience.

Take filter residue, and mix with another 500 mL of 40% spirit. Let soak for some time (30 minutes), and filter again.

Take filter residue, mix with 300 mL of hot water, and filter/squeeze until all liquid has been removed. Some semi-dry fibrous residue will remain (discard).

This operation should yield about 1.4-1.5 L of ginger extract.

In a steel pot, heat
640 g of plain sugar
10 g of citric acid
240 g water
to 90°C for 2 hours (need to measure with thermometer, keep within 90-95°C)
This will give about 850 g – 600 mL of sirup.

Finally, in a large container, mix the sirup, the extract, and 100 g of honey.

Add 20 drops of orange peel oil (essential oil).

ginger citrus aurantium var. dulcis essential oil

As a result of all these efforts you will obtain about 2 L of very healthy ginger liquor that is ideal for gifts, and sure enough, also to maintain your own health.

ginger liquor

To enjoy, either drink pure, 3 tablespoons per serve. Or, even better, mix 3 tablespoons with a cut of hot water (really hot), and enjoy while still hot and inhale the vapors.

Vintage Transistors and IC Stock: listing

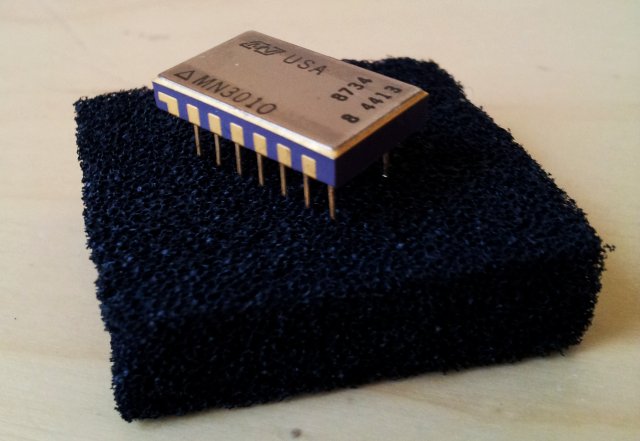
For all folks that are into repair of vintage gear, here is a list of transistors (ICs, quartz crystals) that I have in stock. There are many more in stock, but these below have been listed and are stored in a way that I can find them easily… Primarily, these are for my private shop&repairs, but if you are in desperate need for one of these goodies, just shoot me a line (I may ask for a fee to cover my expenses&time).
These are mainly old Ge and Si transitors, and some amplifier ICs; listings of more outdated ICs – will be added soon.

Location Part Count

K-B35 AC151 – 15 Pcs
K-B35 AC188K – 12 Pcs
K-B35 AC187 – 2 Pcs
K-B35 AC181 – 2 Pcs
K-B35 AC151 – 1 Pcs
K-B35 AC184 AC185 PAIR – 2 Pcs
K-B35 AC185 – 2 Pcs
K-B35 AC550 – 1 Pcs
K-B35 AC150 – 1 Pcs
K-B35 AC424 – 1 Pcs
K-B35 AC179 – 1 Pcs
K-B35 AC178 – 2 Pcs
K-B35 AC176K – 1 Pcs
K-B35 AC117 AC175 PAIR – 1 Pcs
K-B35 AC117
K-B35 AC175
K-B35 AC173 – 1 Pcs
K-B35 AC171 – 2 Pcs
K-B35 AC153 – 3 Pcs

K-B36 OC70 – 6 Pcs
K-B36 OC72 – 1 Pcs
K-B36 OC74 – 1 Pcs
K-B36 OC71 – 1 Pcs
K-B36 OC74N – 2 Pcs
K-B36 OC75P – 2 Pcs
K-B36 OC75 – 5 Pcs
K-B36 OC171 – 1 Pcs
K-B36 OC304 – 5 Pcs
K-B36 OC612 – 1 Pcs
K-B36 OC318 – 10 Pcs
K-B36 OC603 – 1 Pcs
K-B36 OC306/2 – 4 Pcs
K-B36 OC308 – 1 Pcs
K-B36 OC305/1 – 1 Pcs

K-B37 BF245C
K-B37 BF245A
K-B37 BF245B
K-B37 BF244 – 2 Pcs
K-B37 BF225 – 2 Pcs
K-B37 BF224 – 4 Pcs
K-B37 BF223 – 2 Pcs
K-B37 BF258 – 1 Pcs
K-B37 BF458 – 4 Pcs
K-B37 BF324 – 1 Pcs
K-B37 BF422 – 4 Pcs
K-B37 BF716 – 2 Pcs
K-B37 BF715 – 2 Pcs
K-B37 BF467 – 1 Pcs
K-B37 BF891A – 2 Pcs
K-B37 BR303 – 2 Pcs
K-B37 BRY45-400 – 5 Pcs

K-B38 BC107 – 30 Pcs
K-B38 BC108 – 20 Pcs
K-B38 BC109 – 20 Pcs
K-B38 BC110 – 2 Pcs
K-B38 BC114 – 2 Pcs
K-B38 BC130 – 1 Pcs
K-B38 BC129 – 5 Pcs
K-B38 BC115 – 10 Pcs
K-B38 BC132 – 1 Pcs
K-B38 BC140-10 – 1 Pcs

K-B39 2N3019 – 4 Pcs
K-B39 2N3415 – 2 Pcs
K-B39 2N3440 – 1 Pcs
K-B39 2N3705 – 1 Pcs
K-B39 2N3704 – 10 Pcs
K-B39 2N3703 – 6 Pcs
K-B39 2N3638 – 4 Pcs
K-B39 2N3566 – 10 Pcs

K-B43 BC153 – 1 Pcs
K-B43 BC149B – 3 Pcs
K-B43 BC149C – 3 Pcs
K-B43 BC148B – 20 Pcs
K-B43 BC147A – 15 Pcs
K-B43 BC158A – 1 Pcs
K-B43 BC158B – 1 Pcs
K-B43 BC157 – 2 Pcs

K-B42 BSX45 – 8 Pcs
K-B42 BSX46 – 8 Pcs
K-B42 BSX49 – 20 Pcs
K-B42 BSY88 – 3 Pcs
K-B42 BUY48 – 1 Pcs
K-B42 BSY58 – 1 Pcs
K-B42 BSX81A – 30 Pcs

K-B40 BSY79 – 2 Pcs
K-B40 BCY96 – 2 Pcs
K-B40 BCY59 – 10 Pcs
K-B40 BCY58 – 6 Pcs
K-B40 BCW85 – 15 Pcs

K-B41 BC172B – 10 Pcs
K-B41 BC172C – 10 Pcs
K-B41 BC173C – 20 Pcs
K-B41 BC174A – 10 Pcs
K-B41 BC177 – 30 Pcs
K-B41 BC179B – 1 Pcs
K-B41 BC171B – 30 Pcs
K-B41 BC170 – 10 Pcs
K-B41 BC167A – 30 Pcs
K-B41 BC168B – 2 Pcs
K-B41 BC168A – 2 Pcs
K-B41 BC168H – 1 Pcs
K-B41 BC168C – 2 Pcs

K-B21 AF180 – 1 Pcs
K-B21 AF178 – 2 Pcs
K-B21 AF139 – 4 Pcs
K-B21 AF126 – 1 Pcs
K-B21 AF118 – 1 Pcs
K-B21 AF130 – 1 Pcs
K-B21 AF200 – 5 Pcs
K-B21 AF201 – 7 Pcs
K-B21 AF202S – 1 Pcs
K-B21 AF202 – 2 Pcs
K-B21 AF275 – 1 Pcs

K-B17 40361RCA – 13 Pcs
K-B17 40595 RCA – 3 Pcs
K-B17 40664 RCA – 1 Pcs
K-B17 40655 RCA – 2 Pcs
K-B17 40362 RCA – 15 Pcs
K-B17 40406 TCA – 2 Pcs
K-B17 40408 RCA – 1 Pcs

K-B19 AC117 – 8 Pcs
K-B19 AC122 – 10 Pcs
K-B19 AC122/30 – 3 Pcs
K-B19 AC124 – 5 Pcs
K-B19 AC125 – 10 Pcs
K-B19 AC126 – 9 Pcs
K-B19 AC123 – 5 Pcs
K-B19 AC127 – 11 Pcs
K-B19 AC123 – 3 Pcs
K-B19 AC128 – 10 Pcs
K-B19 AC121 – 1 Pcs

K-B20 AF116 – 1 Pcs
K-B20 AF160 – 3 Pcs
K-B20 AF114 – 2 Pcs
K-B20 AF115 – 3 Pcs
K-B20 AF116 – 4 Pcs
K-B20 AF106 – 4 Pcs
K-B20 AF109 – 1 Pcs
K-B20 AF121 – 11 Pcs
K-B20 AF122 – 1 Pcs
K-B20 AF125 – 2 Pcs
K-B20 AF126 – 12 Pcs
K-B20 AF127 – 2 Pcs
K-B20 AF200 – 1 Pcs
K-B20 AF137 – 1 Pcs

K-B12 2N527 – 4 Pcs
K-B12 2N1613 – 3 Pcs
K-B12 2N1711 – 6 Pcs
K-B12 2N1893 – 20 Pcs
K-B12 2N2218A – 2 Pcs
K-B12 2N2219A – 1 Pcs
K-B12 2N2907 – 9 Pcs
K-B12 2N2904 – 11 Pcs
K-B12 2N2368 – 3 Pcs
K-B12 2N2646 – 2 Pcs
K-B12 2N2926 – 8 Pcs
K-B12 2N2905A – 2 Pcs

K-B15 BSW43 – 2 Pcs
K-B15 BSS89 – 2 Pcs
K-B15 BSS97 – 1 Pcs
K-B15 BSW26 – 1 Pcs
K-B15 BSW39/10 – 1 Pcs
K-B15 BSW68 – 3 Pcs
K-B15 BSW66 – 12 Pcs
K-B15 BSW65 – 1 Pcs
K-B15 BSW67 – 1 Pcs
K-B15 BSW58 – 1 Pcs

K-B14 ASY12 – 1 Pcs
K-B14 ASY24 – 4 Pcs
K-B14 ASY426 – 1 Pcs
K-B14 ASY30 – 3 Pcs
K-B14 ASY70 – 1 Pcs
K-B14 AC141B – 1 Pcs
K-B14 AC135 – 1 Pcs
K-B14 AC126 – 4 Pcs

K-B16 BC181 – 1 Pcs
K-B16 BC182 – 10 Pcs
K-B16 BC183 – 4 Pcs
K-B16 BC207 – 20 Pcs
K-B16 BC208 – 2 Pcs
K-B16 BD115 – 1 Pcs
K-B16 BC190A – 2 Pcs
K-B16 BC217A – 1 Pcs
K-B16 BC214A – 1 Pcs
K-B16 BC213A – 5 Pcs

K-B13 BYT11-800 – 1 Pcs
K-B13 9144 50 P01 – 1 Pcs

K-A26 BB609A – 6 Pcs
K-A26 BB141B – 19 Pcs
K-A26 BB409 – 9 Pcs
K-A26 BA244 – 50 Pcs
K-A26 BAX13 – 1 Pcs
K-A26 DB3T – 2 Pcs
K-A26 ZTE1V5 – 30 Pcs
K-A26 ZPD8.2 – 12 Pcs
K-A26 ZPD16 – 14 Pcs
K-A26 ZPD3.9 – 3 Pcs
K-A26 ZDP5.1 – 25 Pcs
K-A26 ZPD15 – 9 Pcs
K-A26 ZPD8.1 – 25 Pcs
K-A26 ZPD4.7 – 7 Pcs

K-A28 XTAL 8.00M HC-49 – 100 Pcs
K-A28 XTAL 4.00M – 20 Pcs
K-A28 XTAL 10.23M – 50 Pcs
K-A28 XTAL 10.245M HC-49 – 20 Pcs
K-A28 XTAL 16.00M – 3 Pcs

K-A27 XTAL 20945K – 8 Pcs
K-A27 XTAL 5120K – 9 Pcs
K-A27 XTAL 16384K – 3 Pcs
K-A27 XTAL 18432K – 12 Pcs
K-A27 XTAL 10240K – 7 Pcs
K-A27 XTAL 92.575M – 6 Pcs
K-A27 XTAL 108.790M – 14 Pcs
K-A27 XTAL 108.765M – 4 Pcs
K-A27 XTAL 108.815M – 20 Pcs
K-A27 XTAL 108.74M – 7 Pcs
K-A27 XTAL 90.42M – 4 Pcs
K-A27 XTAL 21400K – 18 Pcs

K-A30 XTAL 77.42M – 4 Pcs
K-A30 XTAL 3.00M – 3 Pcs
K-A30 XTAL 20.00M – 2 Pcs
K-A30 XTAL 6.00M – 6 Pcs
K-A30 XTAL 61.375M – 7 Pcs
K-A30 XTAL 17.734475M – 6 Pcs
K-A30 XTAL 5.9904M – 2 Pcs
K-A30 XTAL 15600K – 5 Pcs
K-A30 XTAL 13.00M – 1 Pcs
K-A30 XTAL 21855K – 2 Pcs
K-A30 XTAL 18.00M – 4 Pcs
K-A30 XTAL 12.00M – 2 Pcs
K-A30 XTAL 6400K – 11 Pcs
K-A30 XTAL 33.8675M – 15 Pcs
K-A30 XTAL 4.00M – 5 Pcs
K-A30 XTAL 21.855M – 2 Pcs
K-A30 XTAL 16.00M – 1 Pcs
K-A30 XTAL 10.00M – 16 Pcs
K-A30 XTAL 8.00M – 8 Pcs
K-A30 XTAL 57.6575M – 11 Pcs
K-A30 XTAL 67.735M – 12 Pcs
K-A30 XTAL 24.00M – 6 Pcs
K-A30 XTAL 31.64M – 4 Pcs
K-A30 XTAL 5850K – 3 Pcs
K-A30 XTAL 20.945M – 2 Pcs
K-A30 XTAL 95.93M – 4 Pcs
K-A30 XTAL 31.64M – 4 Pcs
K-A30 XTAL 86.13M – 3 Pcs
K-A30 XTAL 10.230M – 2 Pcs
K-A30 XTAL 15.00M – 3 Pcs
K-A30 XTAL 9.8304M – 4 Pcs
K-A30 XTAL 7.3728M – 2 Pcs
K-A30 XTAL 20.5M – 2 Pcs
K-A30 XTAL 18.5925M – 5 Pcs
K-A30 XTAL 99.85M – 2 Pcs
K-A30 XTAL HC MOUNTING CLIPS

K-B50 MPSA43 – 3 Pcs
K-B50 MPSU45 – 5 Pcs
K-B50 MPSA56 – 6 Pcs
K-B50 MPSA63 – 15 Pcs
K-B50 MPSU95 – 5 Pcs
K-B50 MPS6514 – 6 Pcs
K-B50 MPS6513 – 2 Pcs
K-B50 MPSA06 – 2 Pcs
K-B50 MPS3702 – 2 Pcs
K-B50 16551 RCA – 6 Pcs

K-B51 2SC1681 – 7 Pcs
K-B51 2SC1815 – 1 Pcs
K-B51 2SC1921 – 3 Pcs
K-B51 2SC2002 – 3 Pcs
K-B51 2SC2368 – 2 Pcs
K-B51 2SC2062 – 1 Pcs
K-B51 2SC2274 – 1 Pcs
K-B51 2SC2471 – 1 Pcs
K-B51 2SC3071 – 2 Pcs
K-B51 2SC2611 – 2 Pcs
K-B51 2SC3150 – 1 Pcs
K-B51 2SC3114 – 3 Pcs

K-B53 2SC734 – 4 Pcs
K-B53 2SC828 – 2 Pcs
K-B53 2SC900 – 1 Pcs
K-B53 2SC929 – 1 Pcs
K-B53 2SC1507 – 2 Pcs
K-B53 2SC1213 – 2 Pcs
K-B53 2SC1096 – 1 Pcs
K-B53 2SC945 – 8 Pcs

K-B52 2SC114 – 4 Pcs
K-B52 2SC146D – 1 Pcs
K-B52 2SC460 – 2 Pcs
K-B52 2SC536 – 15 Pcs

K-B54 2SD1228M – 1 Pcs
K-B54 2SD525 – 2 Pcs
K-B54 2SD1541 – 1 Pcs
K-B54 2SD1453 – 2 Pcs
K-B54 2SD1455 – 1 Pcs
K-B54 2SD1135 – 1 Pcs
K-B54 2SD1046 – 1 Pcs
K-B54 2SD894 – 2 Pcs
K-B54 2SD613 – 1 Pcs
K-B54 2SD612 – 1 Pcs

K-B62 SS 3277-6 – 2 Pcs
K-B62 S2003MSI – 1 Pcs
K-B62 E505 – 1 Pcs
K-B62 TDA1412 – 2 Pcs
K-B62 ZTX502 – 2 Pcs
K-B62 SIP5172 – 3 Pcs
K-B62 S7504 T1045C – 1 Pcs
K-B62 S-300-E – 7 Pcs
K-B62 CS9011E – 1 Pcs
K-B62 S2017 T1907A – 4 Pcs
K-B62 SFT47 – 5 Pcs
K-B62 TP5368 – 4 Pcs
K-B62 S6157 – 2 Pcs

K-B55 2SD313 – 1 Pcs
K-B55 D45H7 – 2 Pcs
K-B55 2SD77 – 1 Pcs
K-B55 2SD471 – 1 Pcs
K-B55 2SD476 – 2 Pcs

K-B56 2SB22 – 1 Pcs
K-B56 2SB54 – 3 Pcs
K-B56 2SB56 – 2 Pcs
K-B56 2SB77 – 12 Pcs
K-B56 2SB405 – 2 Pcs
K-B56 2SB329 – 9 Pcs

K-B57 2SB536 – 1 Pcs
K-B57 2SB544 – 1 Pcs
K-B57 2SB595 – 1 Pcs
K-B57 2SB910M – 1 Pcs
K-B57 2SB669 – 1 Pcs
K-B57 2SB649 – 1 Pcs

K-B60 ZTX238 – 20 Pcs
K-B60 ST1-B N52 – 1 Pcs
K-B60 ZTX3904 – 6 Pcs
K-B60 ZTX415B – 7 Pcs
K-B60 ZTX3707 – 6 Pcs
K-B60 ZTX3706 – 1 Pcs
K-B60 ZTX3903 – 6 Pcs
K-B60 ZTX327 – 1 Pcs
K-B60 ZTX3708 – 2 Pcs

K-B61 TDA1670A – 1 Pcs
K-B61 L298 – 1 Pcs
K-B61 TLP298KV – 1 Pcs
K-B61 AN5521 – 1 Pcs
K-B61 SANYO-002 HDK-U – 1 Pcs
K-B61 µPC1378H – 1 Pcs
K-B61 LA7837 – 1 Pcs
K-B61 LA4430 – 1 Pcs
K-B61 TDA4600-2 – 1 Pcs
K-B61 LM2877P – 1 Pcs
K-B61 KIA7217AP – 1 Pcs
K-B61 LAS6350P – 1 Pcs
K-B61 AN5265 – 1 Pcs
K-B61 LA4440 – 1 Pcs
K-B61 TA7250BP – 1 Pcs
K-B61 LL6207 – 4 Pcs
K-B61 HYBRID SMS 3112 207 10503 – 1 Pcs

ST LIS3MDL Triaxial Magnetic Sensor: a lot of data, for such a small VFLGA package

For some project to be discussed later, a magnetic sensor will be an essential ingredient. Time for some preliminary tests, using ST Microelectronics LIS3MDL sensor.

lis3mdl package

Just 2x2x1 mm, and 12 contacts! Not an easy tasks, but as you can see, wires can be soldered to all these contacts. Will be covering this with a bit of expoxy glue soon.

lis3mdl closeup

The “schematic”, it is rather simple. All is connected to a small ATmega32L board, running at 16 MHz, and handling the USB interface used to get the data out.

lis3mdl schematic

The board, mounted to a box, showing the XYZ coordinates.

lis3mdl box

After some configuration and programming, believe it or not, there is actually a signal on the DRDY (data ready) line – this is set high, whenever data is available. The AVR uses the configuration register to query data acquisition status. But DRDY could be used as well. For best noise performance, the LIS3MDL is run at its fastest and most precise setting, getting 1 sample every 6.5 ms – about 155 Hz data rate. Date is then decimated to 1 point per second, transferred to a PC via USB, and further decimated to 1 point per minute.

lis3mdl drdy signal 155 hz 2 ms xdiv

Some calculations later – the total field (data points: one per minute, ticks show 6 hour intervals):

lis3mdl total field 1 point per minute

Inclination – New York (actual, correct data: -13 deg Declination, 67 deg Inclination, total field: 52 Microtesla, about 0.52 Gauss).

lis3mdl inclination

Declination (absolute value – acutual declination would be negative).

lis3mdl declination

… well, not quite accurate yet, but close enough! Some variations seem to be due to temperature, others, not so sure, living next to a train line here, and a lot of magnets around, including, strong magnets. And the cardboard box, it is not really square and rectangular, nor is the alignment perfect.

For those interested, the AVR code snippet used to get the data from the mm-size “brick”: lis3mdl_avr

Micro Networks Corporation MN3010 DAC: long term stability test of a rather unconventional DAC

Recently, I found a MN3010 chip, in a pretty fancy and unconventional ceramic/gold/metal package. Turns out, it is a DAC; but not a normal DAC – rather a 2 digit BCD DAC.

mn3010 top

mn3010 gold side

mn3010 spec

MN3010 Datasheet

mn3010 test board

Quickly hooked it up to an 8 bit port, counting in cycles, from 0 to 255… This is the resulting output:

mn3010 bcd counting up scope

Bottom line is about -13 volt, top is 0 V. 2 V per vertical division.its

Notice the strange steps – this is a clear indication of the “BCD” nature of this chip – 4 upper bits encoding the output in 1 volt steps, and the lower 4 bits encoding the 0.1 V digit.

Now, to put it to a test – re-programmed the counter to actually count in BCD digits, from 0 V, to -10.9 V – which is a bit above the specification – the device is supposed to output 0 to -10 V.

mn3010 input vs output

Next, let this thing run for about 18 hours recording the voltage at each of the allowed input codes, using a HP 34401A 6.5 digit volt meter, using a little program and GPIB cable.

These are the output voltages, as a function of time, for certain fixed codes:

mn3010 18 hour drift

… I would say, the DAC is rather stable: it consumes about 0.5 Watts, and is running warm, but it appears to be reasonably insensitive to temperature, far better than 0.1 LSB (more like 0.01 LSB!)

After recording all the numbers, some number crunching using well-known Excel…. multi parameter linear regression.

mn3010 regression analysis

Regression analysis yields the voltage values associated with the bits, they are close, but the 0.2 and 0.4 V have some deviation. It’s a pitty I didn’t test this device about 30 years ago, then we would know if this deviation is due to age, or just the result of normal manufacturing tolerances (certainly all within specified limits).

mn3010 bit values from regression

mn3010 bit value dev

Here, as a last graph- the total deviation (which contains all error sources, including any offset errors), accordingly, the output tends to be 0.005 to 0.02 V (0.05 to 0.2 LSB) low, digital code vs. actual output voltage. Pretty good (limit is +-0.25 LSB), still.

mn3010 total dev

Now, let’s keep this device another 30 years, and repeat the test…… I will keep you posted.

Micro-Tel Precision Attenuation Measurement Receiver: an all-electronic manual for an almost all solid state device

Look at what I have here, finally, an (well, almost, 1 page missing) PDF manual for a Micro-Tel 1295 Precision Attenuation Measurement Receiver. Including all schematics…

1295 manual

…a pleasure for the eye and joy forever!

1295 a4 if module

1295 a3b6

If you have any rare manuals, let me know, much appreciated!

Ultrasonic Pest Chaser: scare way all the rats, squirrels and other furry creatures….

Winter approaching, all the pests of the world would like to hibernate in my attic. And around the house, an increasing number of squirrels is feeding off the birds’ food. But hold, for every problem, there is an electronic apparatus that can solve it, it this case: an ultrasonic pest chaser.

First of all, we need a random ultrasound signal generator. Tests have shown that frequencies in the 18 to 30 kHz range are best, and that not all animals respond to the same frequencies. So we need a cover-all solution. Furthermore, animals will get used to certain noises, even 105 dB ultrasonic noise. So we need to build-in some surprises. Sometimes, the machine will be quiet, then it will come up with all kinds of nasty sounds. Sure enough, at high level.
This is achieved by a little microprocessor, an AVR ATmega8, but you can use any micro of your choice. Please check out the source code – the sounds are generated by using certain pre-set sequences of breaks, durations and sound frequencies, and these are rotated in a repeated (but very long) pattern. The pattern won’t repeat to soon, because prime numbers have been chosen for the lengths of the sequences, thus, they appear almost random for the listener (only those with ears able to receive high frequency noises like this).
There is also a LED indicator signaling the ON state of the ultrasound. Even if you can’t hear it, please stay away from the speakers – these >100 dB may damage your hearing without any prior notice. Keep children away. As always, this post is for your education only, don’t try it at your home!!

marder sig gen schematic

The signal generator schematic is as simple as it gets – frequency is derived from a 4 MHz crystal, via TIMER1 of an ATmega8. Some auxiliary circuitry is used to derive a 5 VDC rail from the supply voltage (anywhere from 10 to 30 V, depending on the speaker).

marder power driver schematic

The power driver uses two NPN transistor and a MOSFET to provide sufficient current for the speaker. The speaker, some are under test, more about them later. Piezo high frequency speakers are the speaker of choice for this application.

marder signal gen board

Some pictures of the boards – all build on plated-through FR4 perf board, this will last a long time even when use outside.

marder driver board

A test, using a 10 Ohm load resistor, and a 40 kHz drive signal. The MOSFET is switching nice and fast, no issues. For the speaker, it might help to couple the (capacitive) piezo with a suitable inductance, and to add a DC decoupling capacitor (about 1 µF, pulse resistant type). You can see that the resistance of the MOSFET in ON state is about 1 Ohm, current is about 1 Amp, for a 12 VDC supply voltage – and 0 V is one graticule up from the bottom of the scope.

marder 40 khz test 2 v ydiv

Finally, a test of the circuit, frequency (Hz) vs. time (seconds). This nicely shows the “random” nature of the noise, with breaks of various lengths in between noise bursts. Poor squirrel, poor rat – but they have a choice: keep out of harm’s way, and out of the attic!

marder signal test

This is the microprocessor code, avrgcc.

marder1_151130

Compact Fluorescent Lamp (CFL) TP120-13MSL, 13 Watt: some circuit analysis

Quite honestly, I don’t like these compact fluorescent lamps (CFLs) too much. They save energy, maybe, but the light produced is not really appealing, and in the long winters here, some extra heat produced by an ordinary light bulb is much appreciated anyway.

cfl lamp t120

Having a few defective CFLs around, I could not resist to open one up and check inside. That’s the schematic.

cfl compact fluorescent lamp schematic

More can be found at other sites, this is quite comprehensive: CFL Schematics (LabKit).

cfl circuit

The circuit uses a rather small ring core transformer, two primaries, for feedback, 3 turns each, and a secondary, 9 turns. Two transistors MJE 13003 (in TO-92 package) are arranged to form an oscillator circuit. These transistors can handle 600-700 V no problem. The DIAC (BA3) forms the starter circuit, giving a first few pulses to the oscillator, when the lamp is still high-impendance (prior to ignition). Once the lamp has started, the D5 diode will disengage the start-up circuit.

The transformer:

cfl transformer t1

Below, wrapped in blue tape, and with an E-E ferrite core, that’s the choke, about 1.6 mH inductance, which is part of the lamp’s resonant tank (along with C3, C5, and the secondary transformer – and C7, which will play a minor role, because of its comparatively large value).

cfl coil l1

HP 8569B Spectrum Analyzer: reference level adjust repair (broken contact)

A very common fault for the 8569B (and 8565A, 8569A) are defective front panel assemblies because of missing or broken contacts. One particular case is a broken input attenuator switch assembly contact, for the manual/variable attenuation level encoder. This variable attenuation adjustment actually uses a potentiometer (green part), and this mechanically coupled to a BCD encoder, formed by a few contacts and a gold-plated circuit board.

This repair is part of a re-assembly tasks – a gentleman out there had disassembled the switches, and I promised to help out with the re-assembly. But as often, things are a bit more difficult than they first appear, and it turned out not to be only an assembly job, but a repair job.

8569b assembly job

8569b contact repair level adj knob

One of the contact fingers is clearly not making any contact to the circuit board.

8569b contact repair level adj before

To fix, just support the contacts with a piece of circuit board, or other plastic or metal sheet of adequate thickness.

8569b contact repair level adj supported

Then, using 2-component epoxy glue, apply a good amount along the section holding down the contacts. with some contacts still properly mounted, this will hold down the others, for a lasting repair. Sure, you can also use a small amount of JB Weld or similar compound, but I would always advise to apply it evenly over all contacts rather than just trying to fix an individual contact – this will provide added strength.

8569b contact repair level adj

Make sure to properly cure the epoxy before putting things together again. I usually let is sit for close to the heater for a few days.

SimonsDialogs – A wild collection of random thoughts, observations and learnings. Presented by Simon.